CML 2.7 – Getting started with Cisco Modeling Labs v2.7
 Last weekend I decided to try Cisco’s Modeling Labs (CML). This is Cisco’s network virtualization platform comparable to GNS3 or EVE-NG. It replaced an older Cisco product called VIRL (Virtual Internet Routing Lab), offering more features and improved performance.
I have quite a lot of experience with both EVE-NG and GNS3, so I’m curious to see how CML will compare.
In this article we go over the following steps:
Getting started
I went with the option of installing CML on my ESXi server.
This installation will cover a fresh install on VMware ESXi using the CML .OVA file.
Some useful links before we get started:
CML information:
https://www.cisco.com/c/en/us/products/cloud-systems-management/modeling-labs/index.html
CML Licensing:
https://learningnetworkstore.cisco.com/cisco-modeling-labs-personal/cisco-modeling-labs-personal/CML-PERSONAL.html
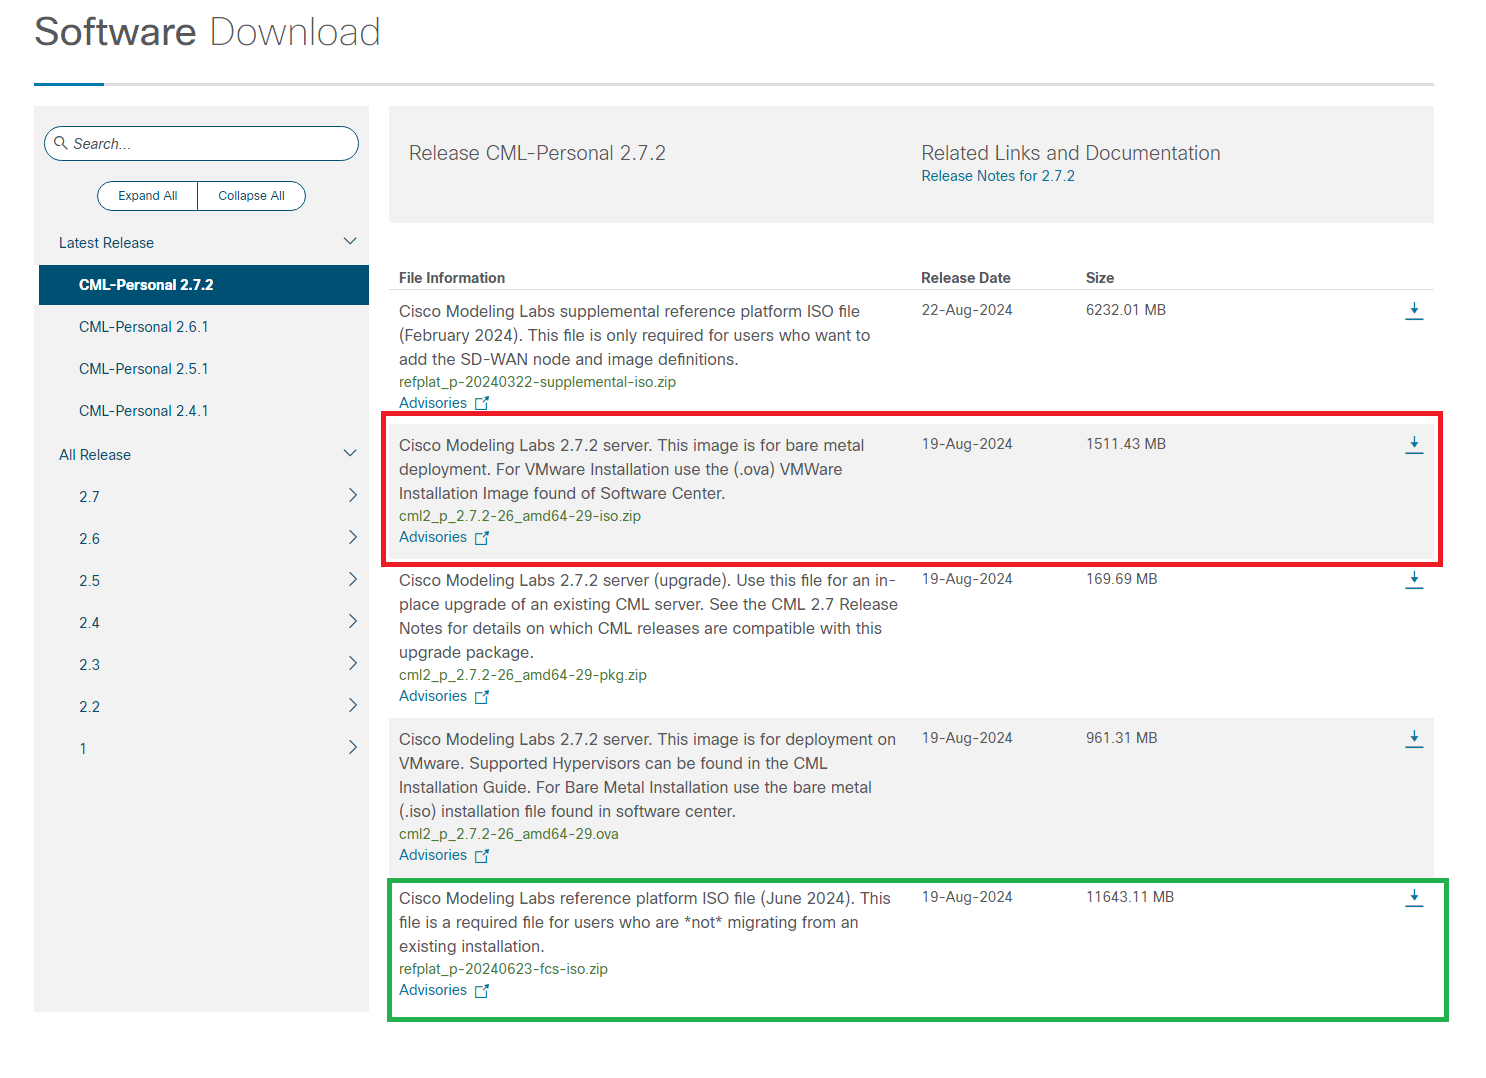
Software download:
https://software.cisco.com/download/home/286290254/type/286290305/release/CML-Personal%202.7.2
We start by downloading two files from the software website. We need both of these for the install.
-
- The server installation file (either the OVA of the ISO).
- The reference platform ISO (this contains the router images that are used in CML).
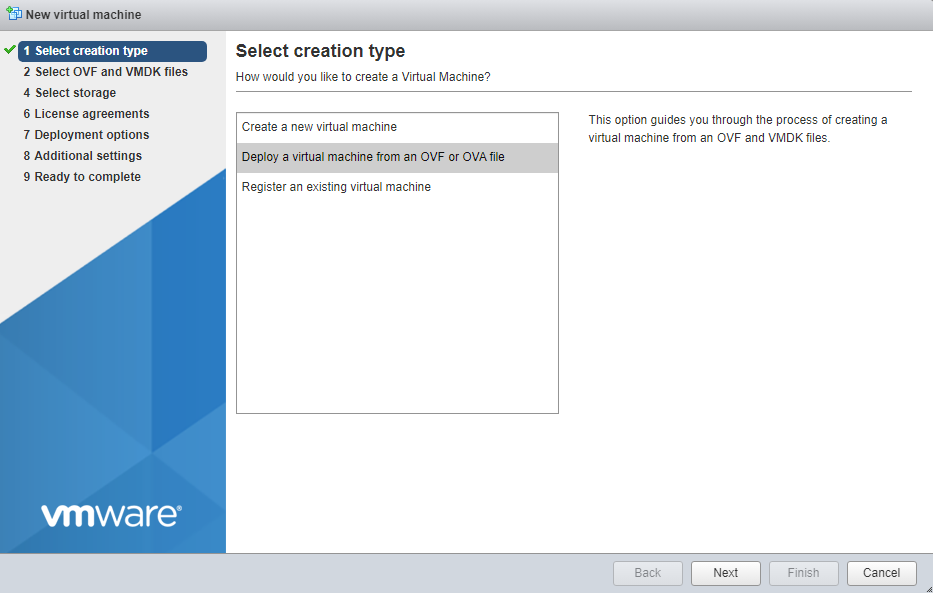
VMware: Creating the CML Virtual Machine
1: The first step is registering the new Virtual Machine:
 2: Give it a name and select the downloaded OVA:
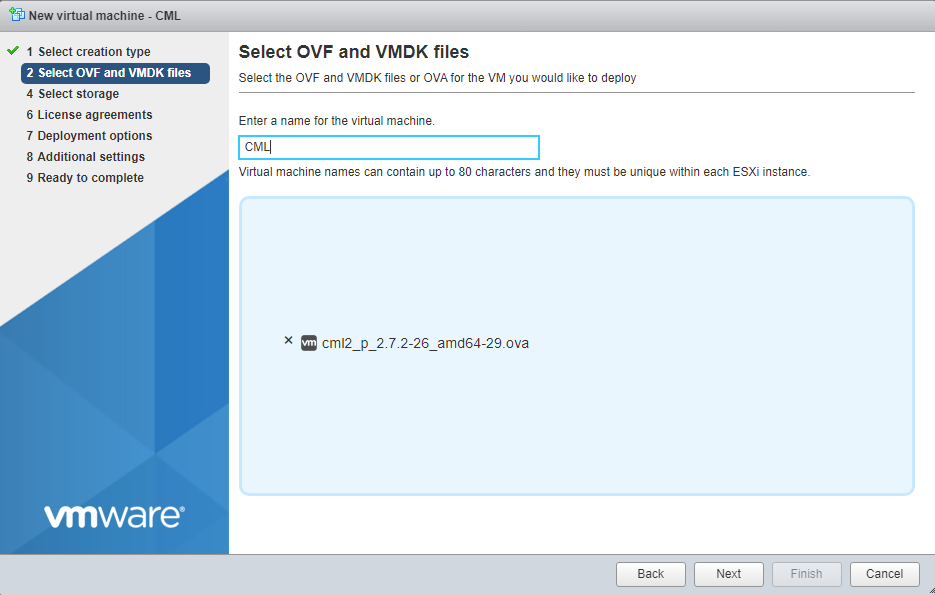 3: Select the datastore:
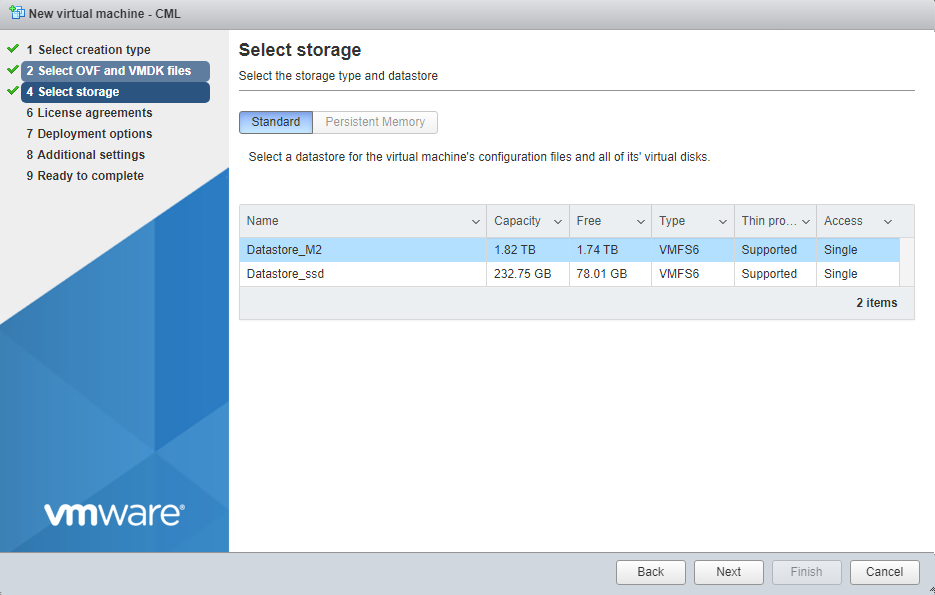 4: Select your Deployment options:
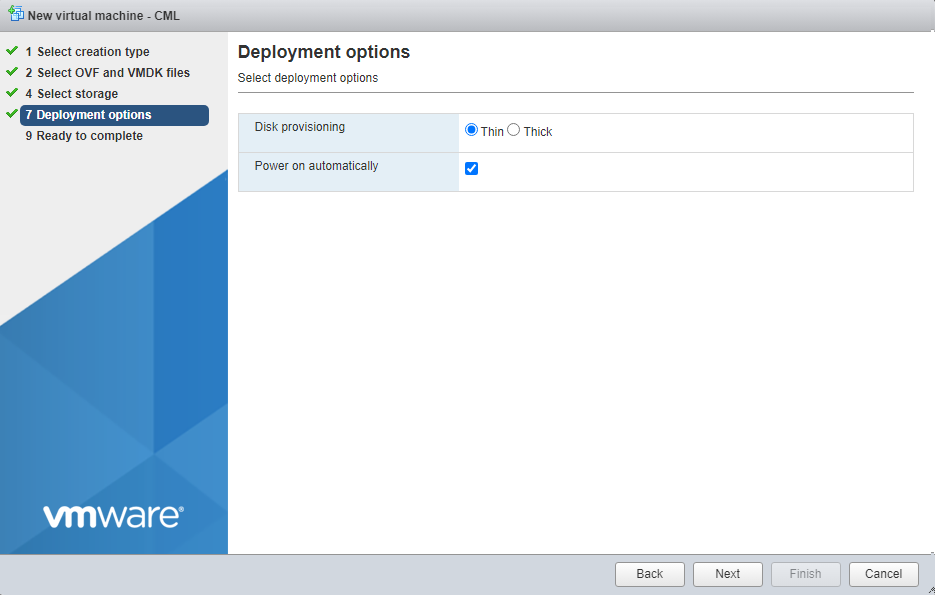 6: Verify and finish.
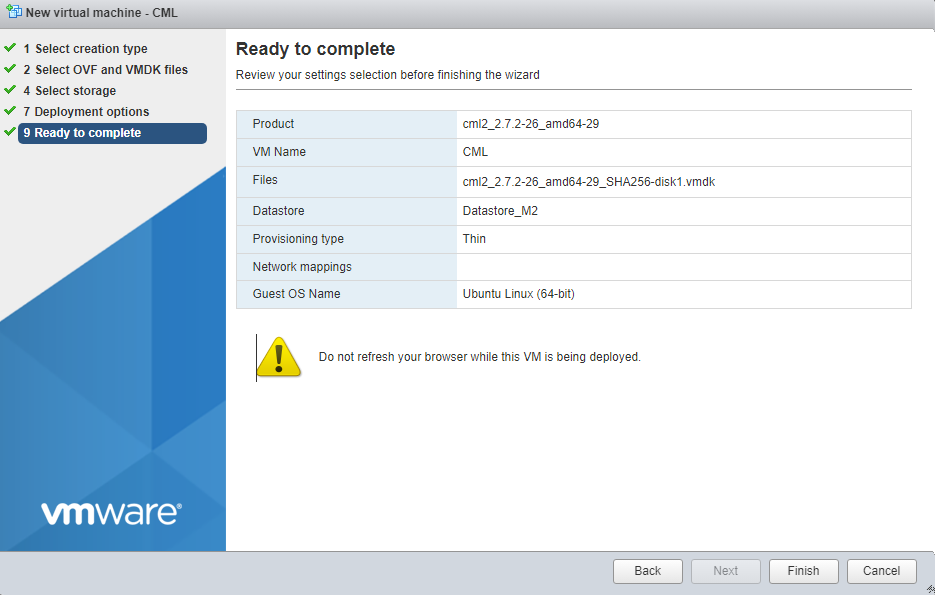
CML: Installing the server
Once the Virtual Machine is registered and and booted you can access the console.
From the console we will start the CML installation.
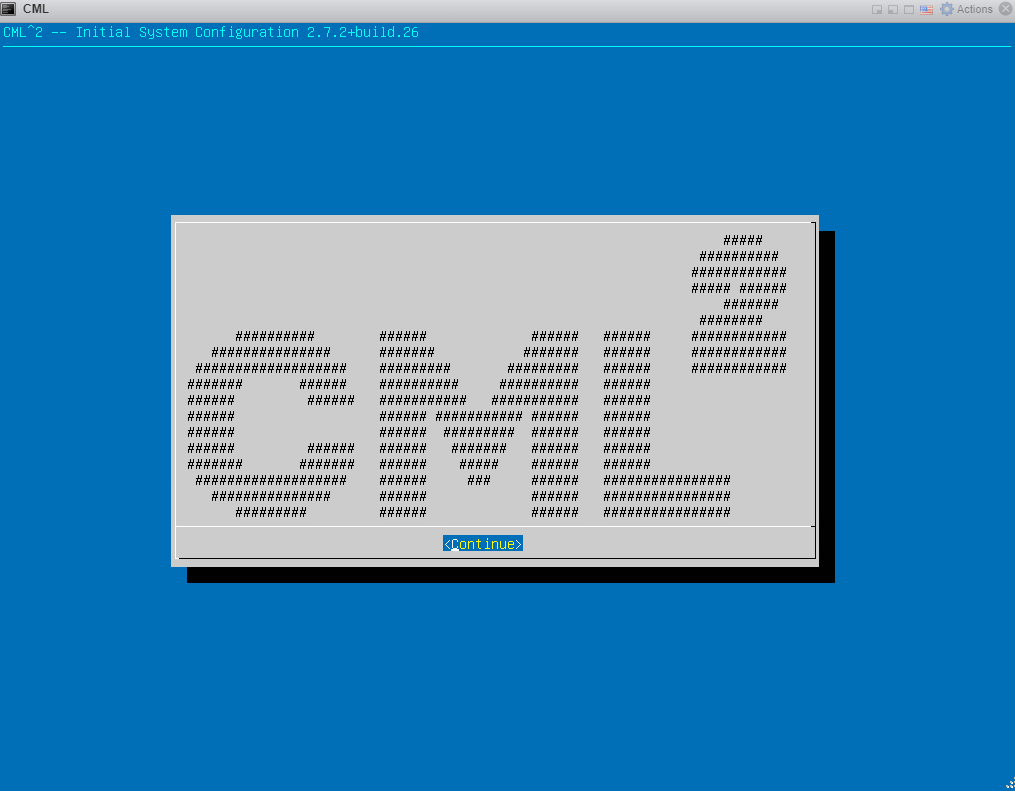
1: Splash screen:
 2: Accept the EULA:
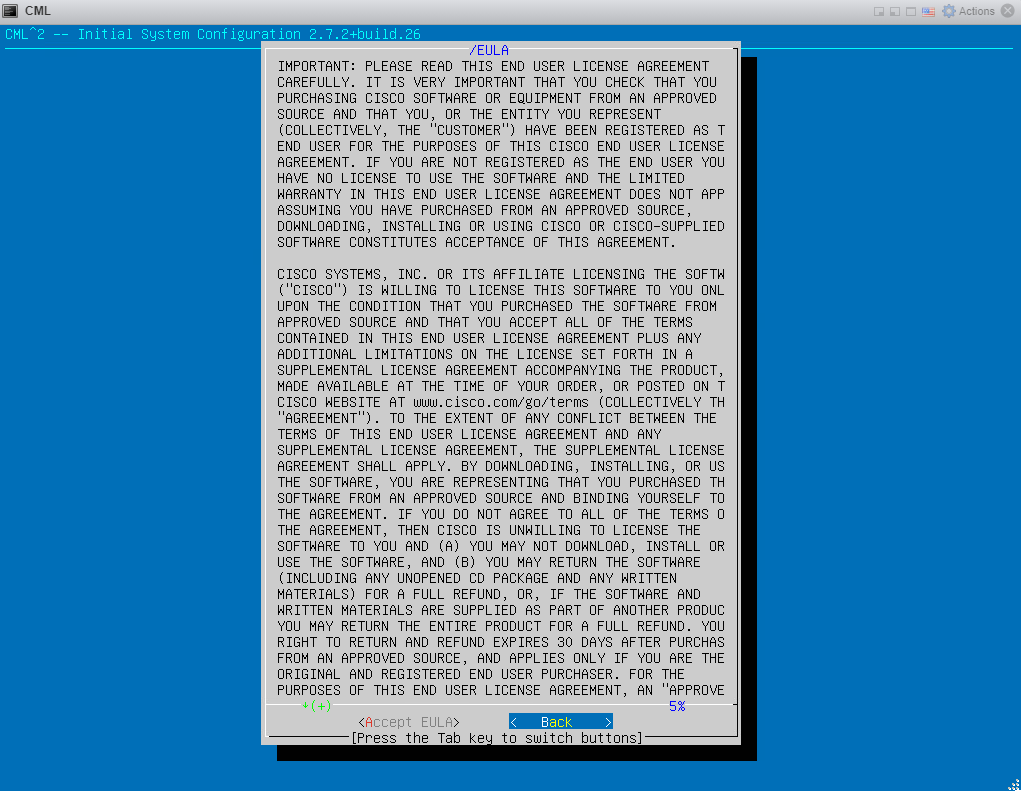 3: Information for accessing the Cockpit (port 9090):
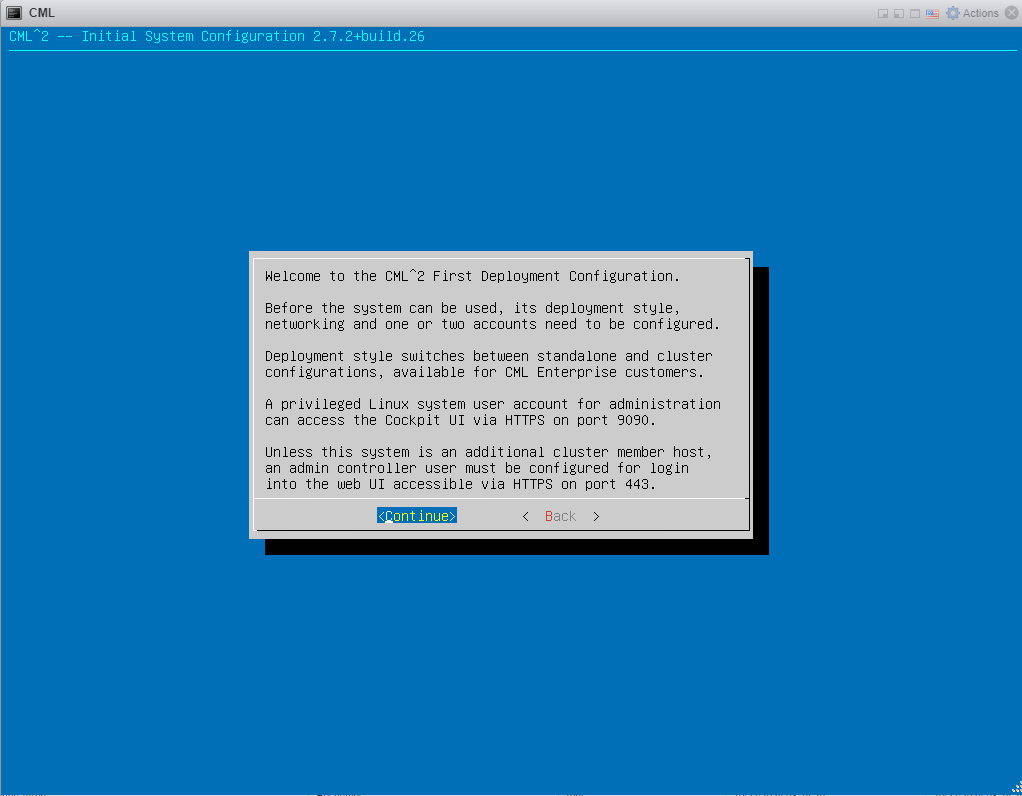 4: Continue:
 5: Continue with standalone all-in-one deployment.:
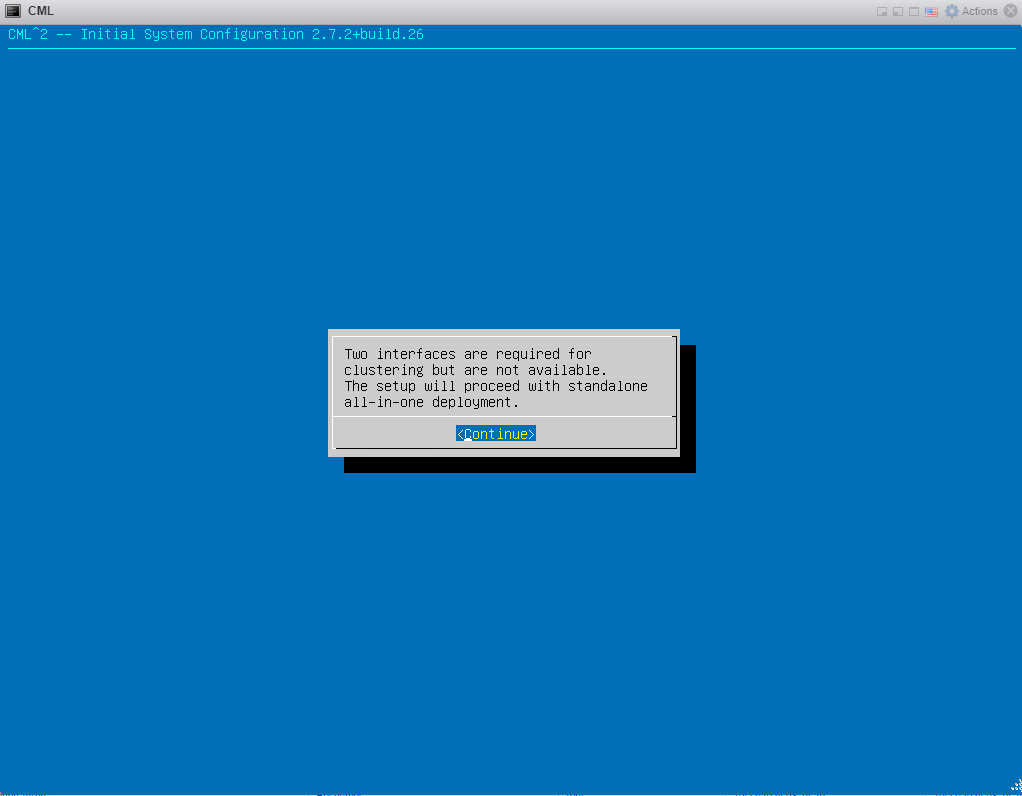 6: Enter the hostname:
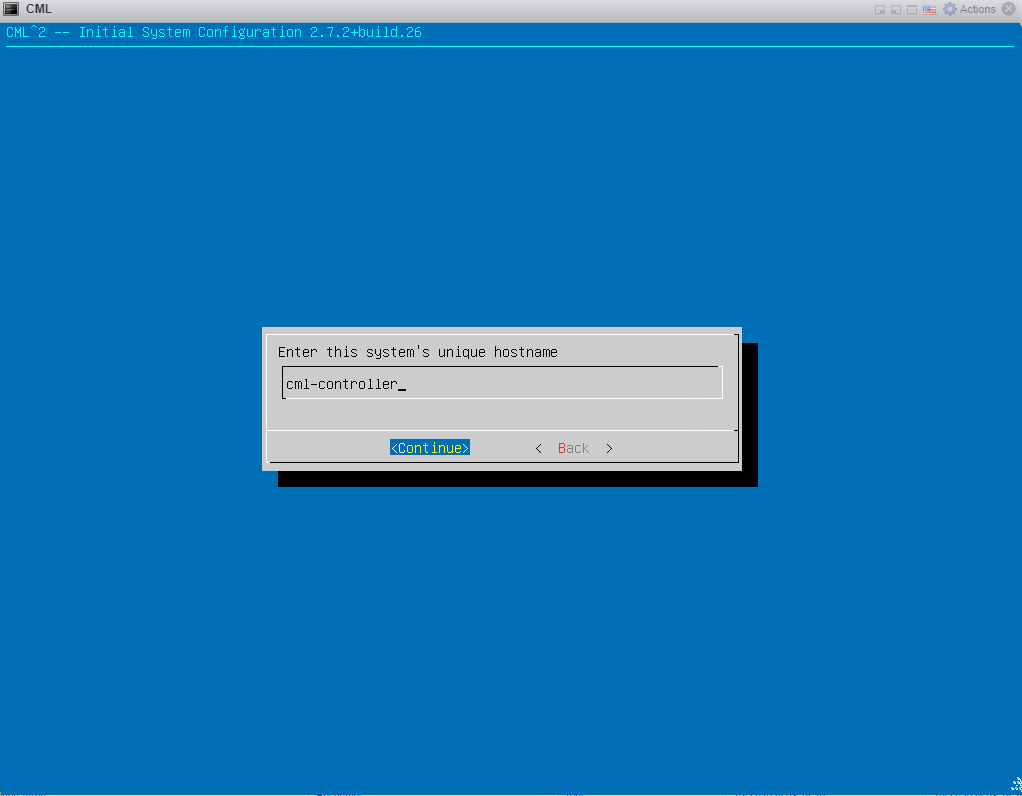 7: Create a system user:
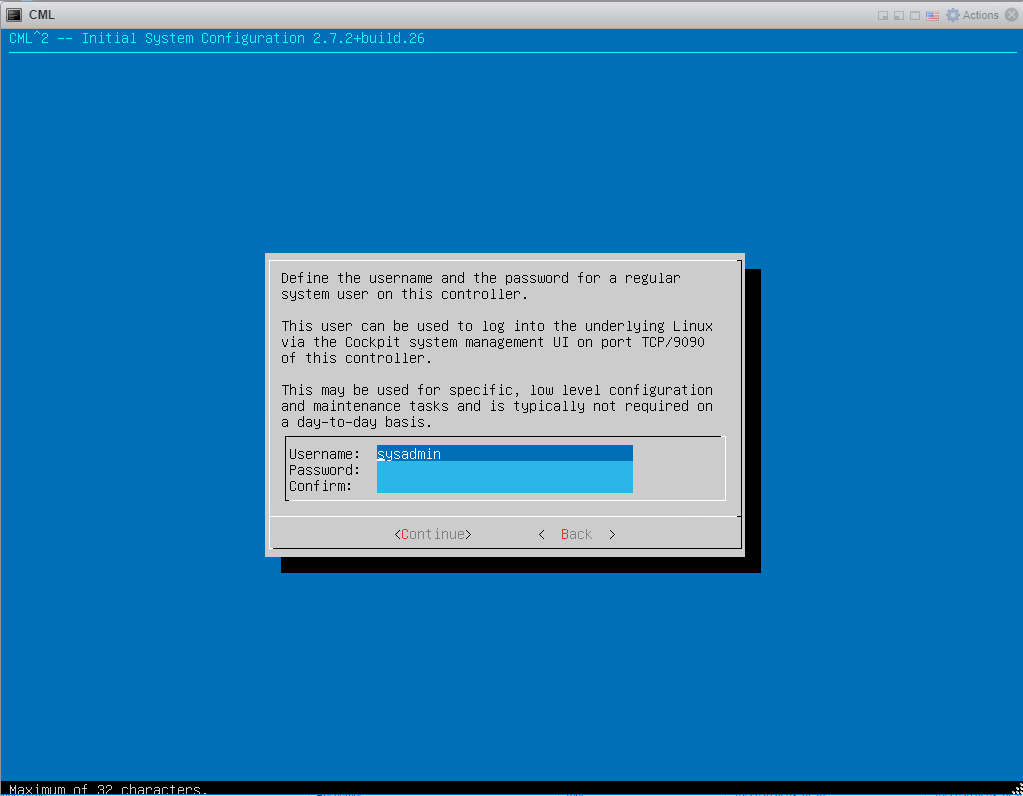 8: Create the admin user:
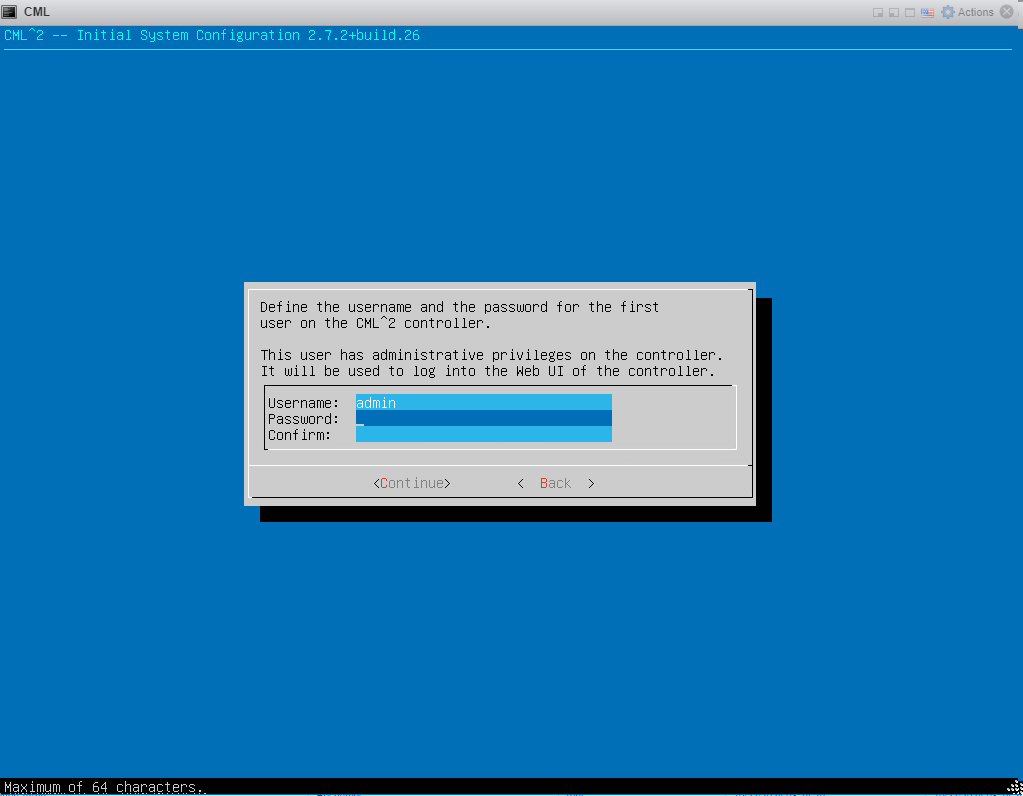 9: IP addressing:
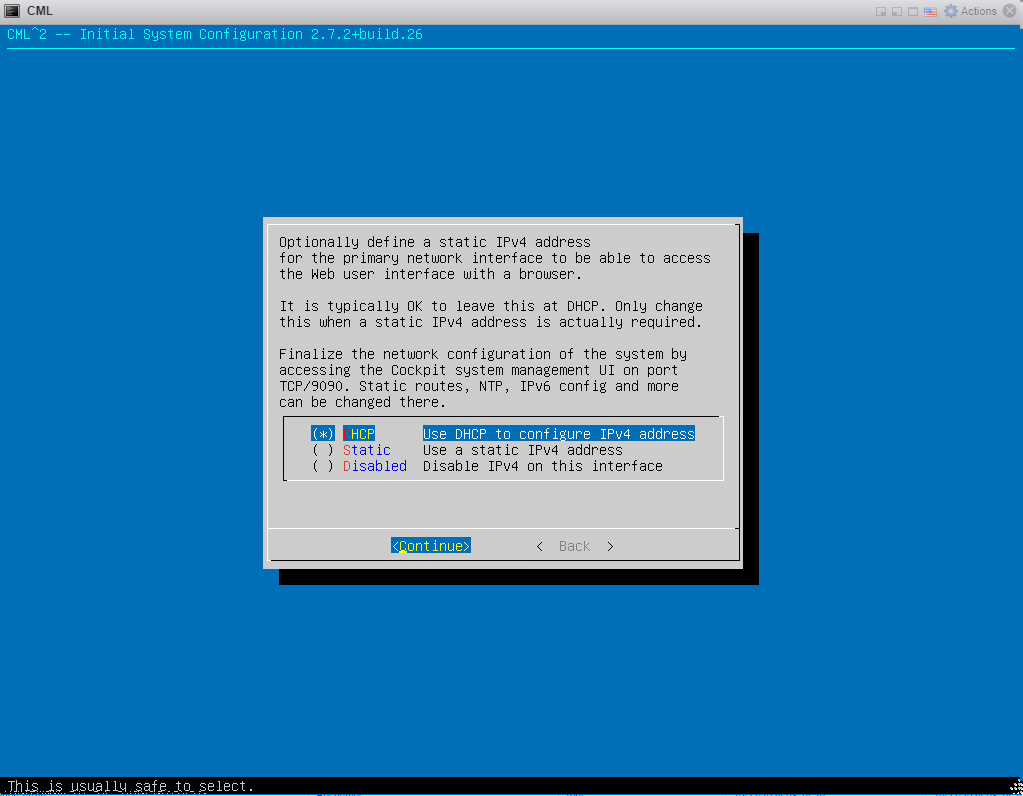
IMPORTANT:
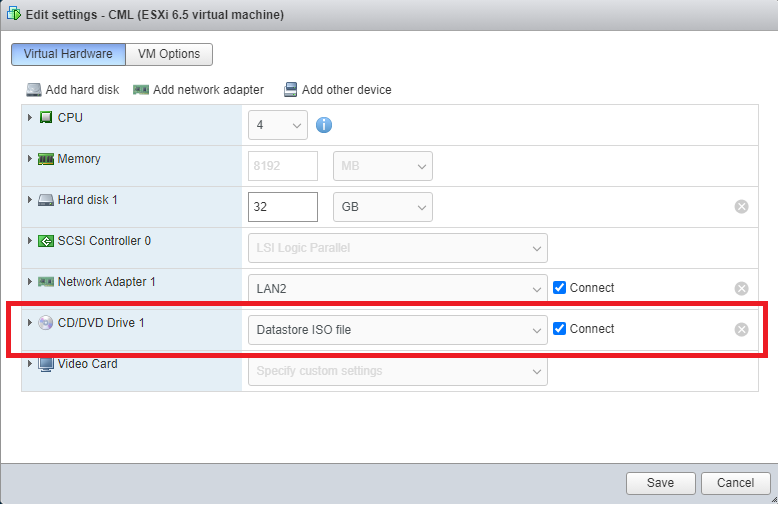
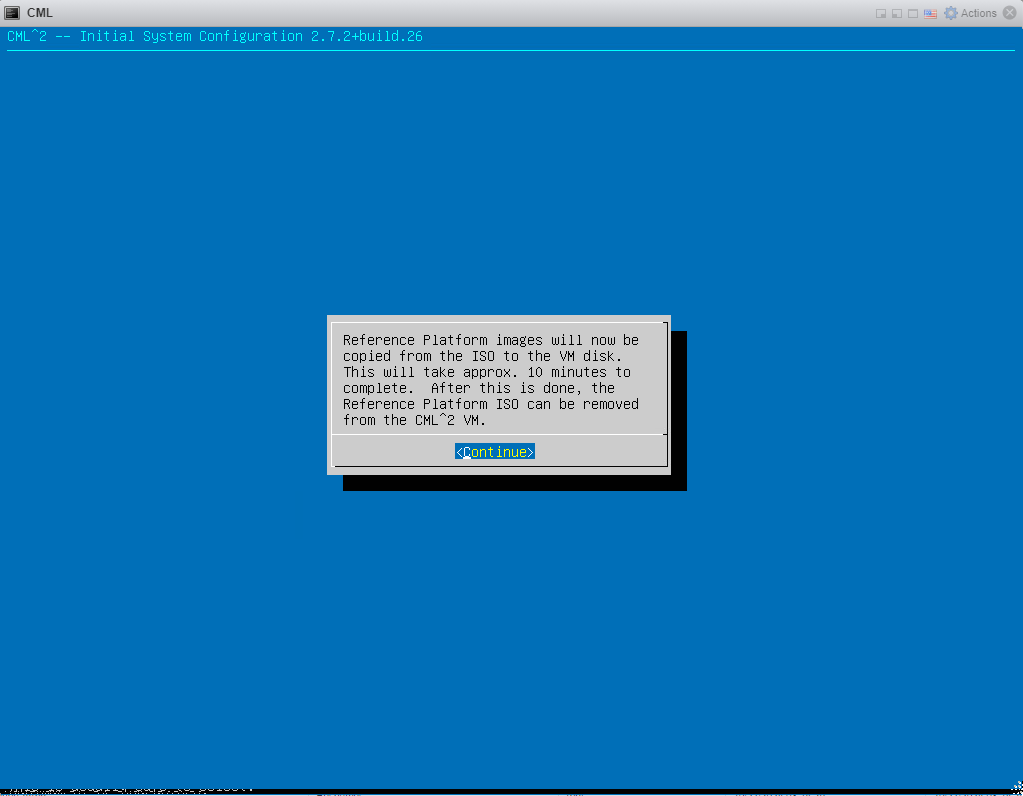
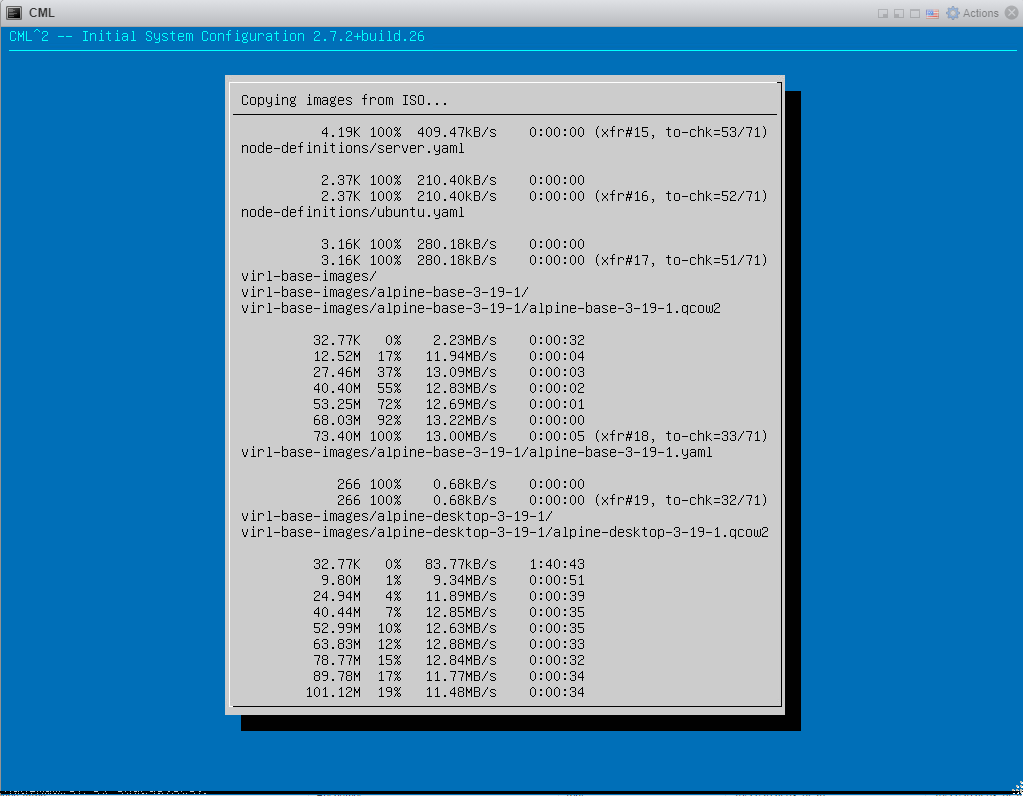
10: Attach the reference ISO file as CD/DVD Drive in VMware by editing the Virtual Machine.
The ISO is used to copy the router images/nodes into CML.
11: Done!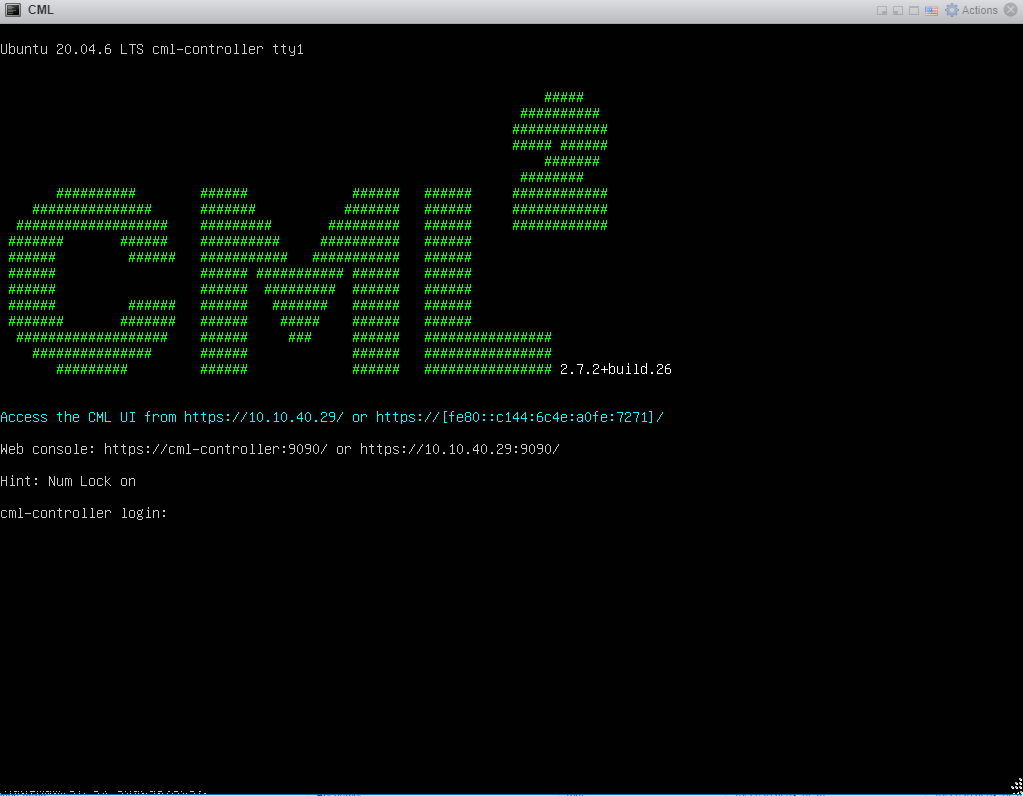
You can now access CML via https://<IP> or access the administration cockpit via https://<IP>:9090
Expanding the vCPU, Memory and Disk size in CML
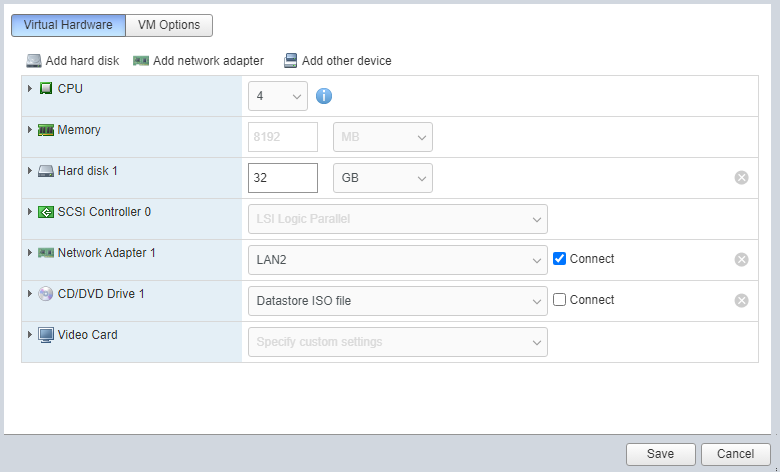
If you used the OVA file the Virtual Machine is configured with the following specs:
-
- 4 vCPU’s
- 8GB memory
- 32 GB Harddisk
This works fine for basics lab, but I’d like to give the machine a little more power.
Increasing the vCPUs and Memory is fairly straightforward by editing the Virtual Machine’s hardware settings:
Expanding the virtual hard disk requires extra steps in the System Administration Cockpit which will we cover later.
First we add another 32GB to the virtual hard disk.
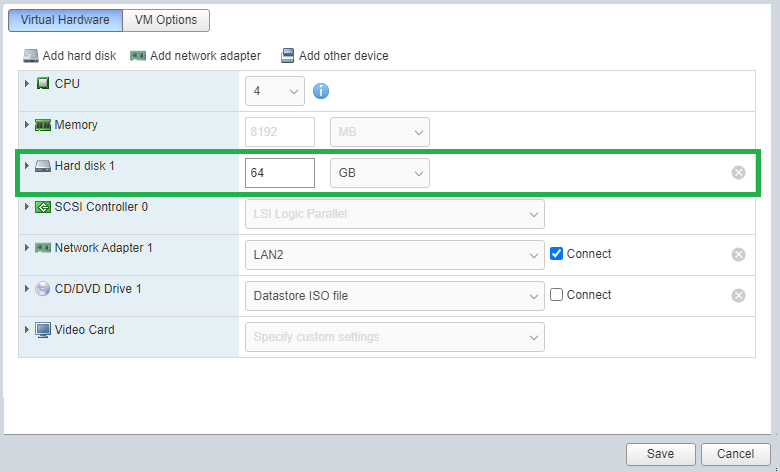
To allocate this extra 32GB we need to access the CML System Administration Cockpit.
CML System Administration Cockpit
When you need to access the System Administration Cockpit it will be available on:
https://<CML-IP>:9090
From there we can log in using the system account we created during the installation.
1: Login to the System administration Cockpit:
2: From navigation pane open “Storage”: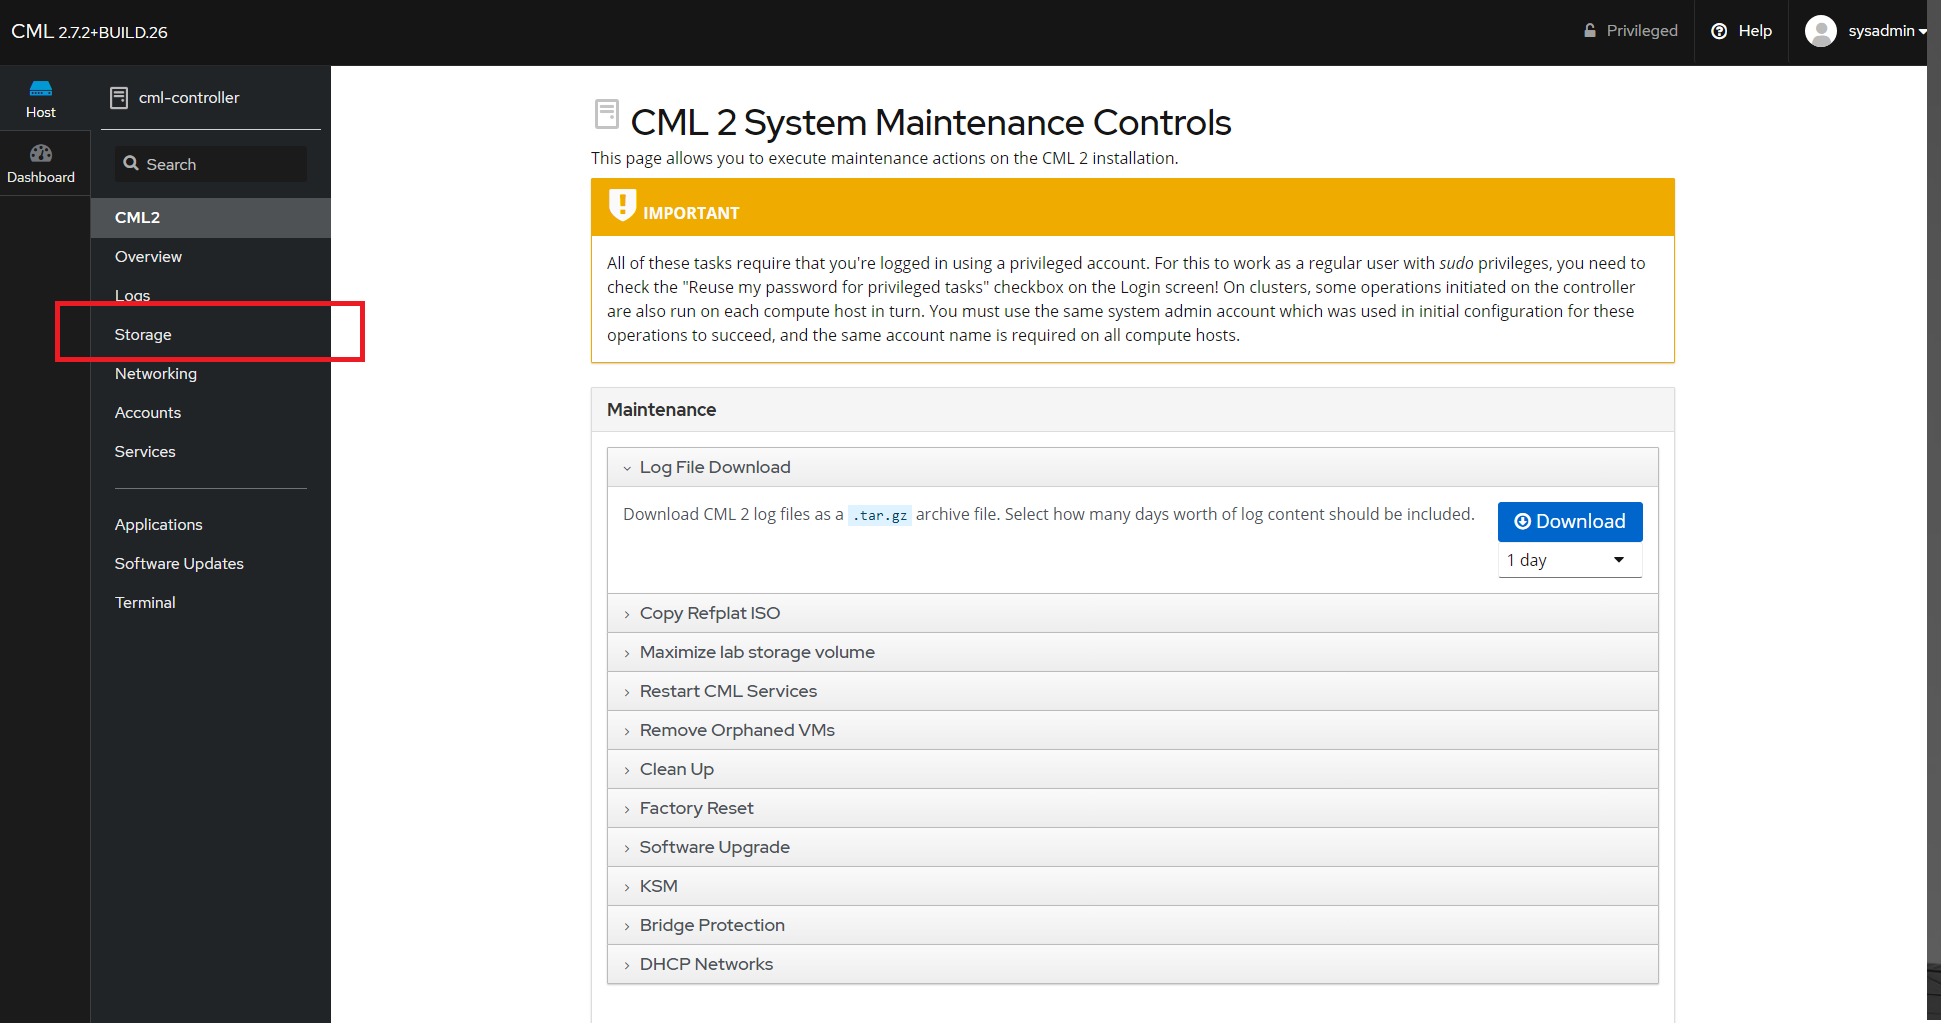
3: On the top right open the Disk: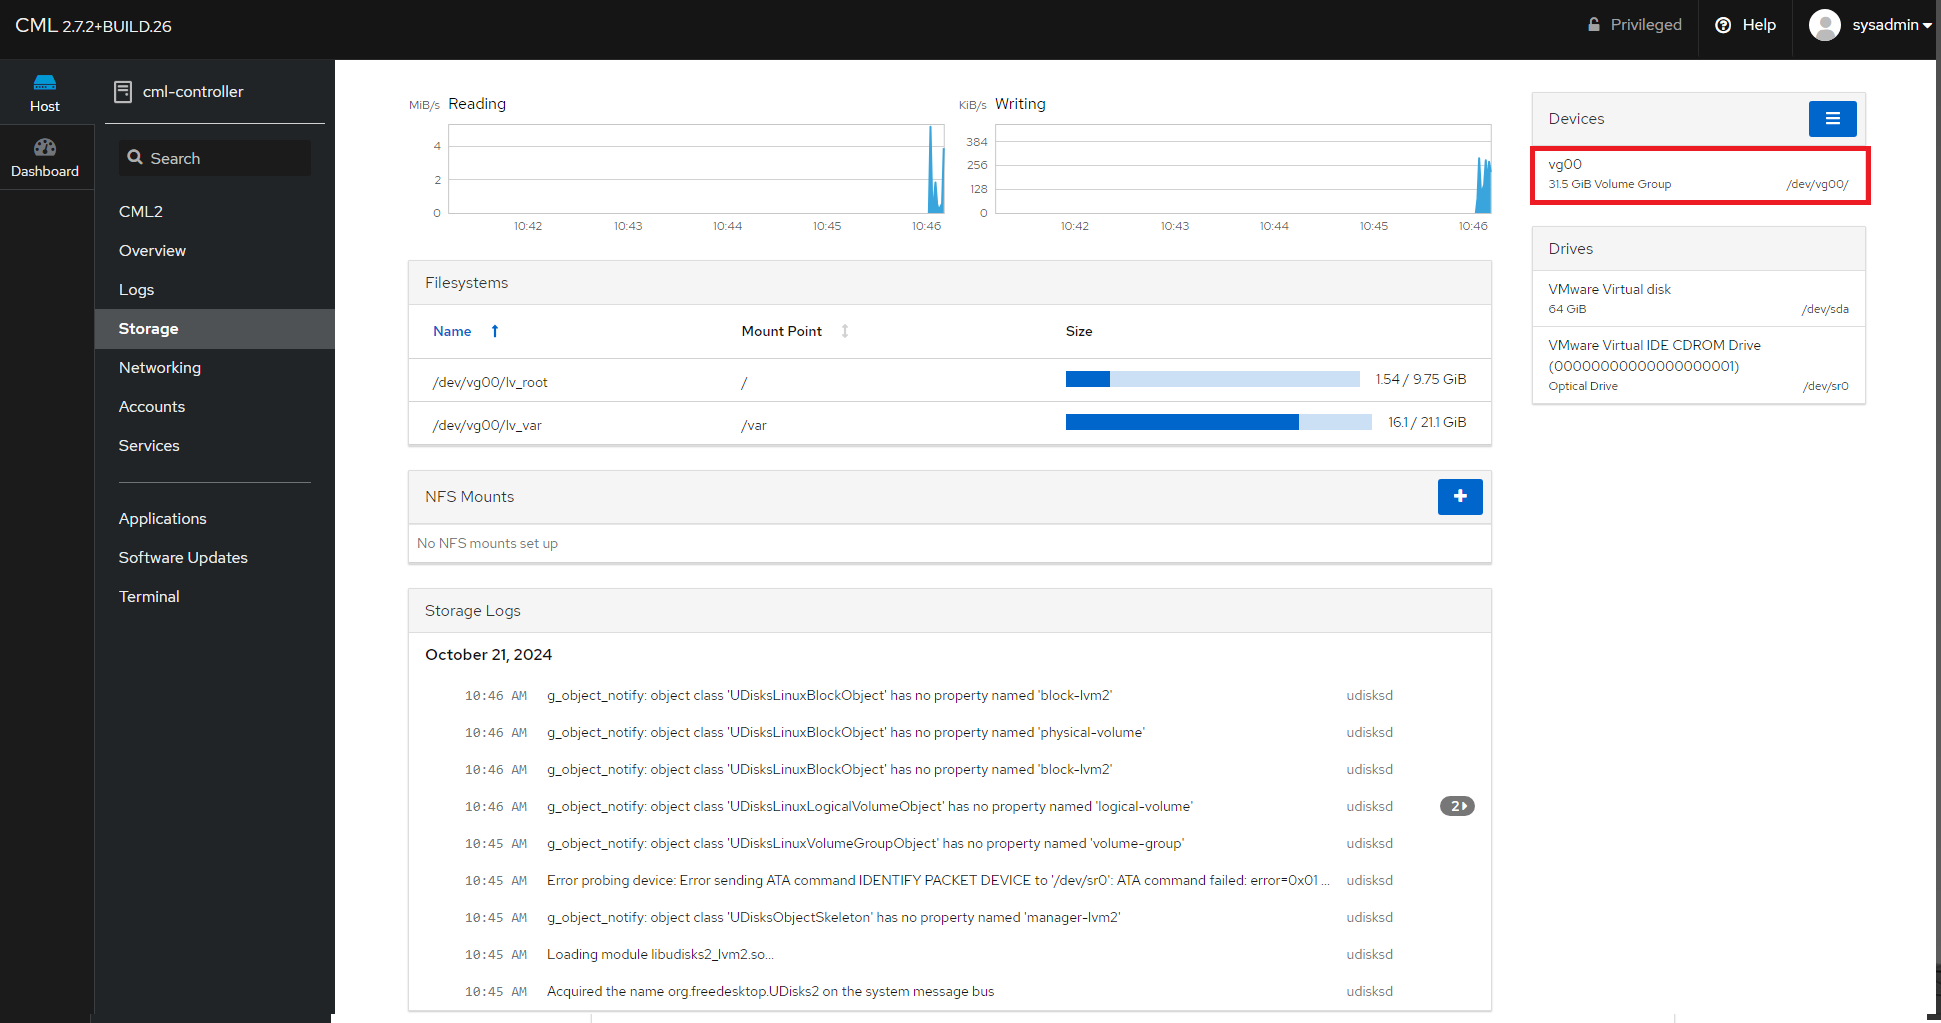
4: Add the new volume with the + button:
5: Add the new allocated space: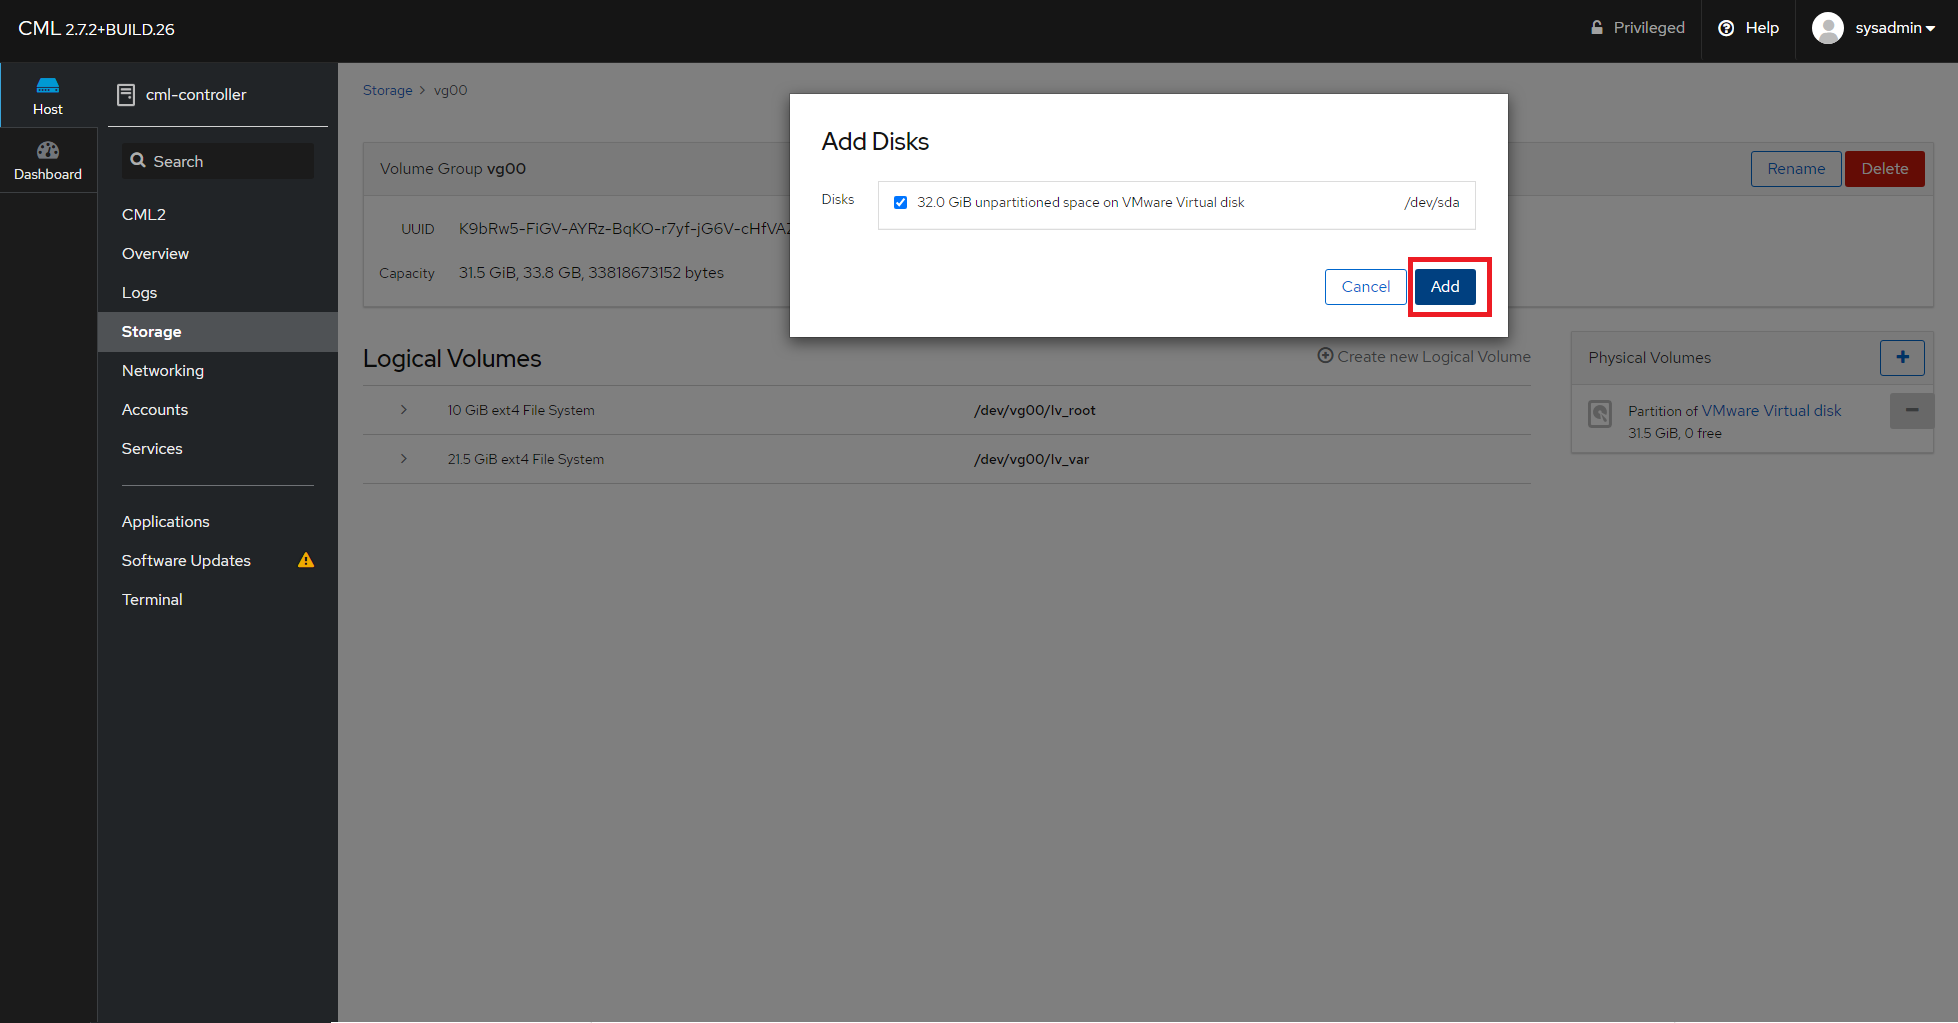
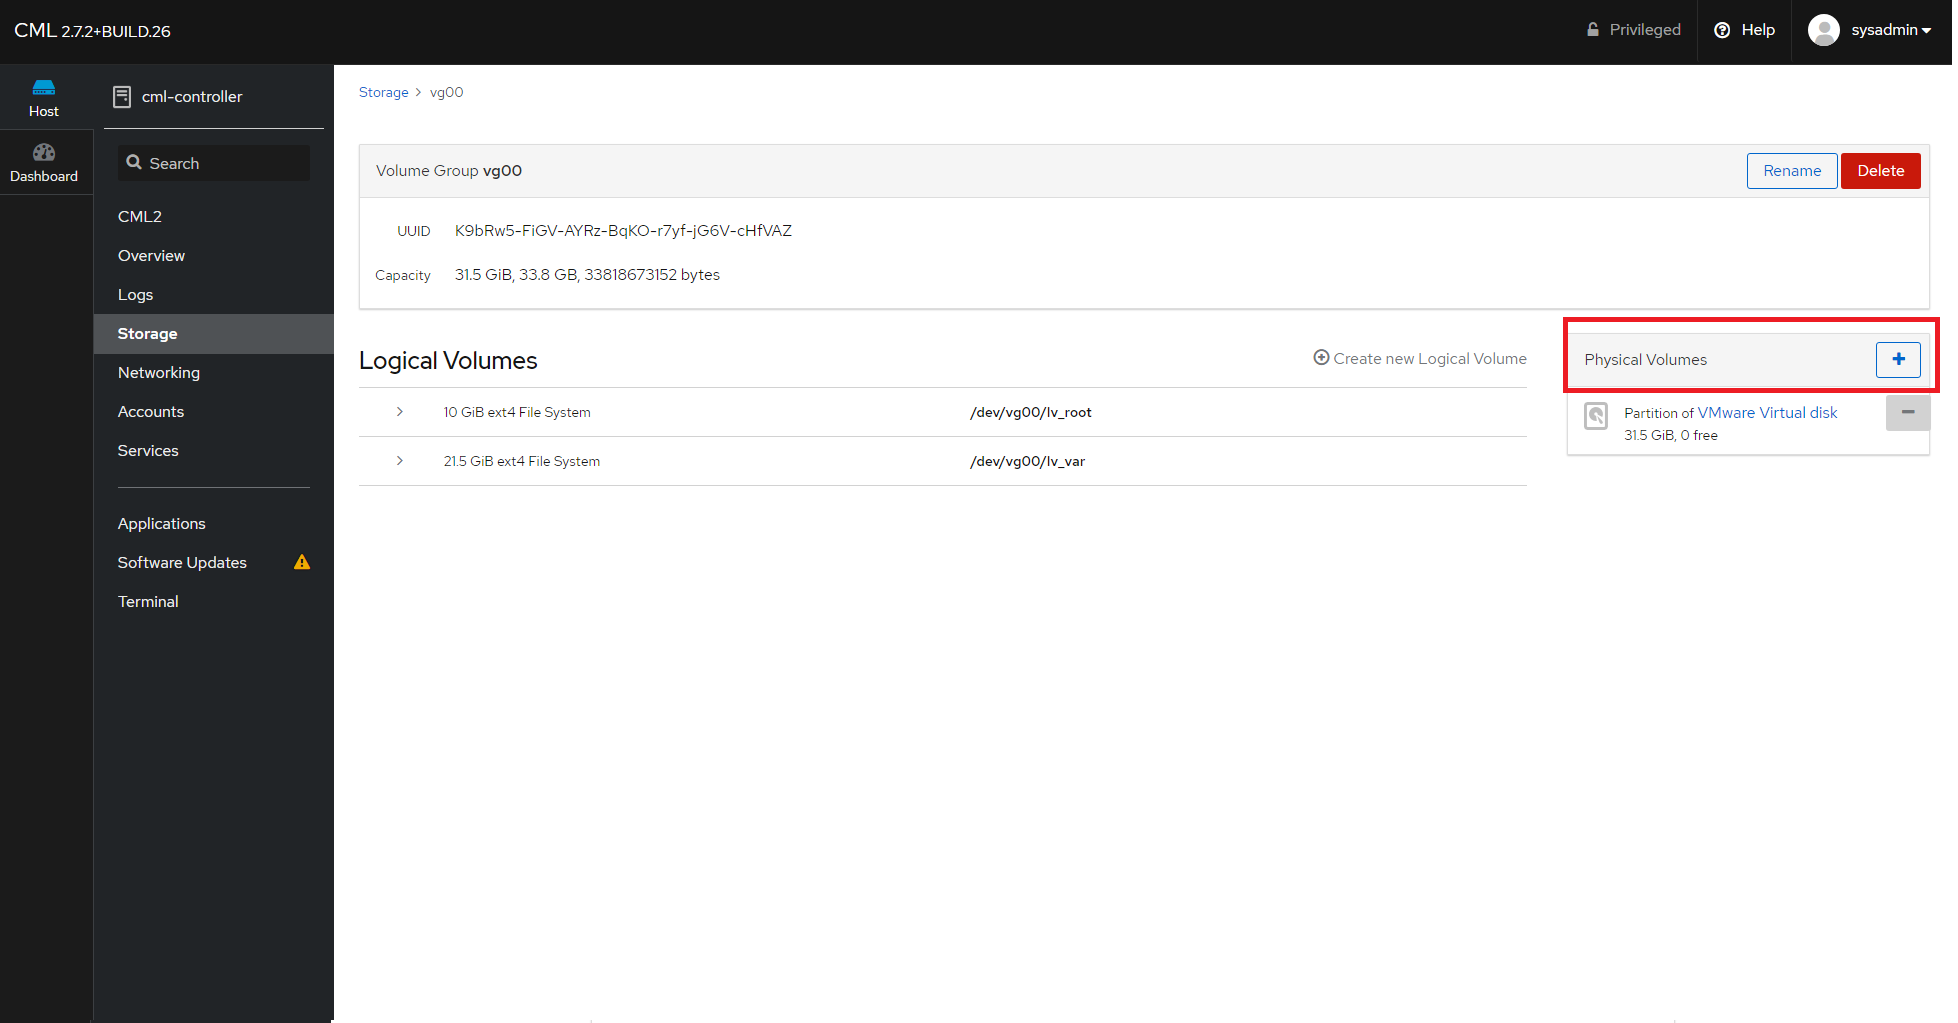
6: The new Virtual Disk is added: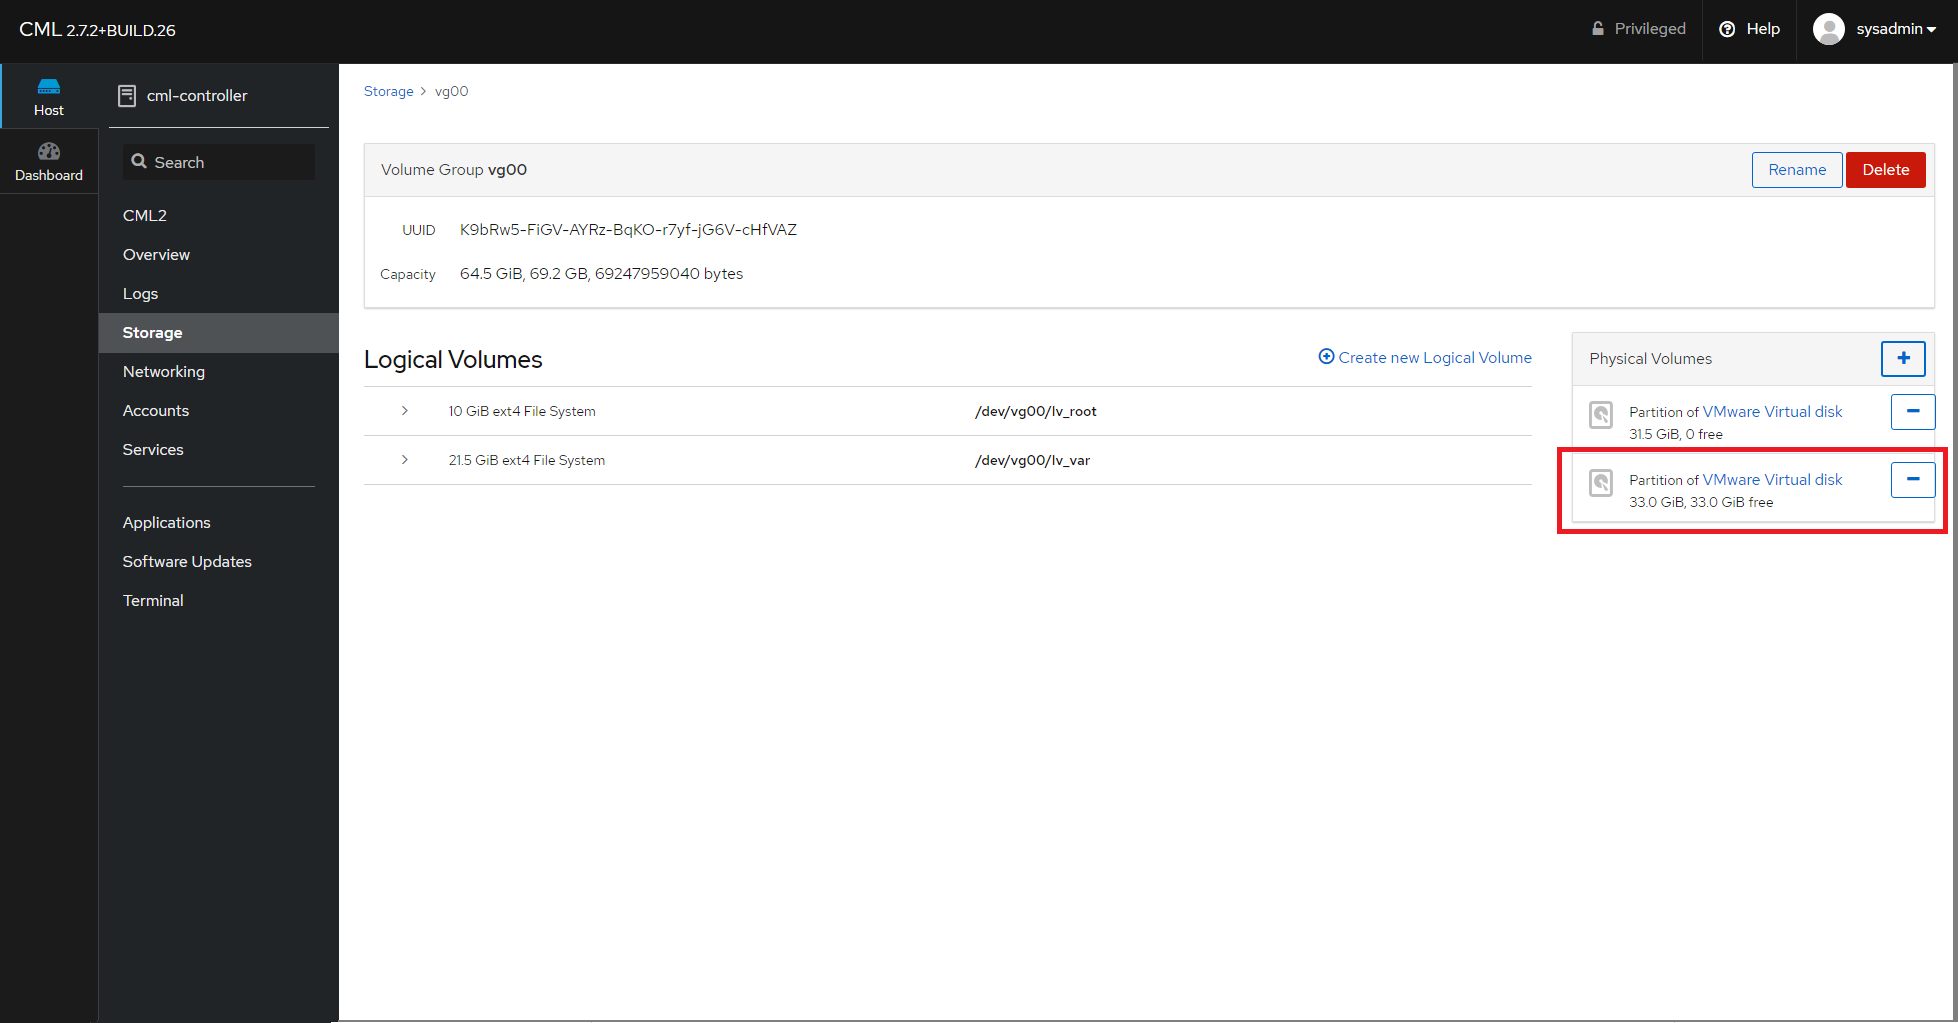
7: Use the new space to “Grow” your filesystem: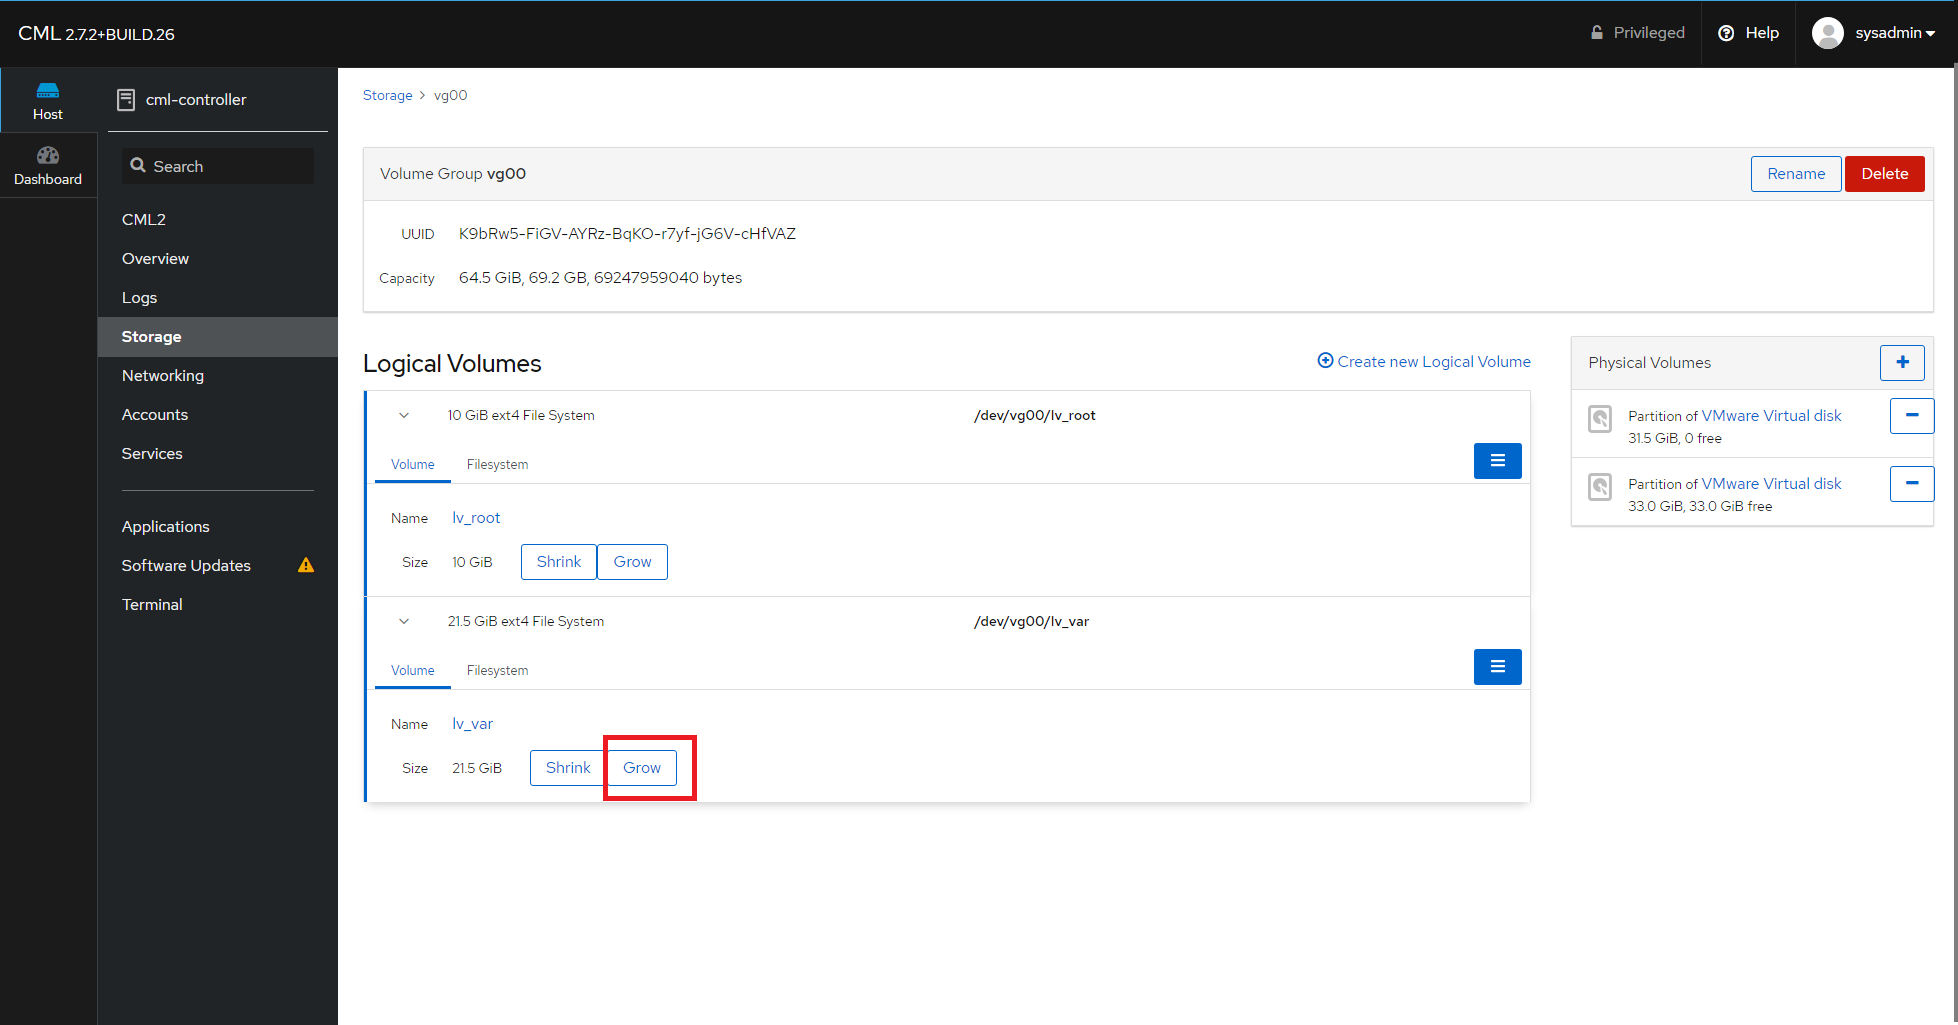
8: Select the size (everything) of the new volume you want to use: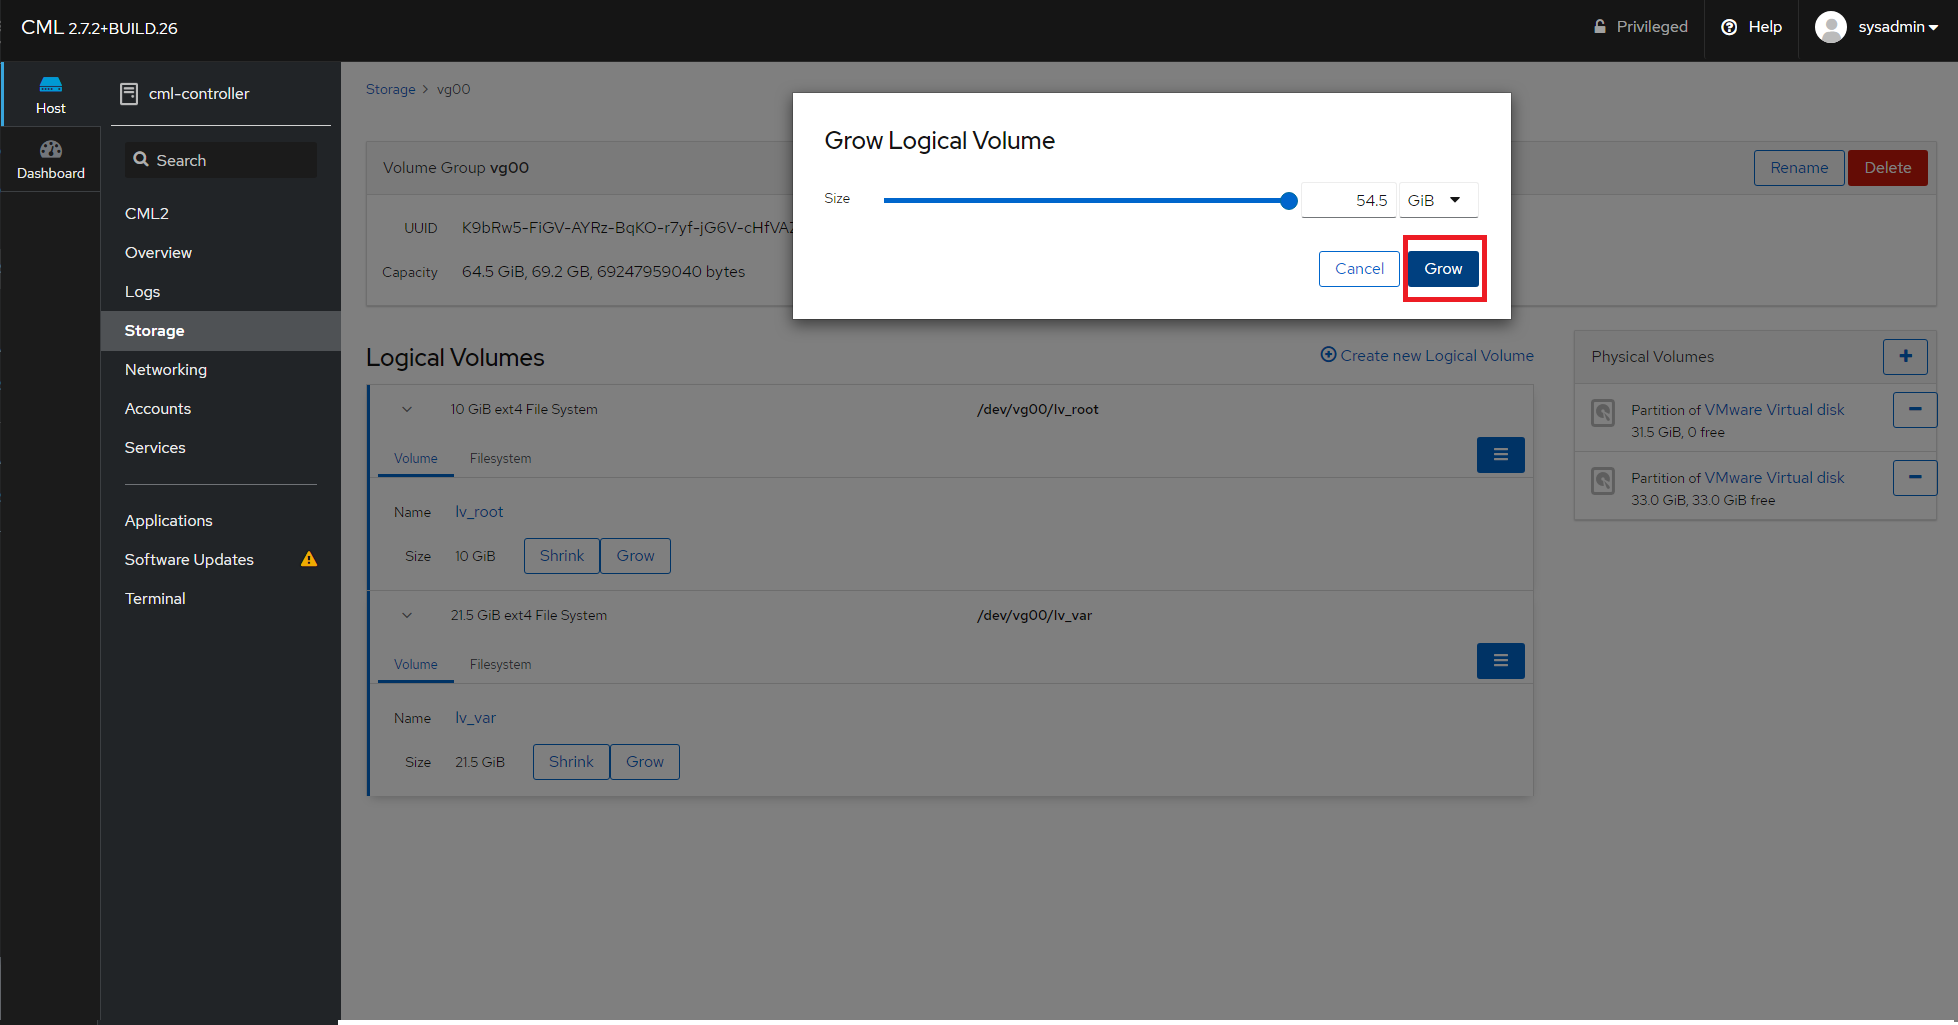
9: Done!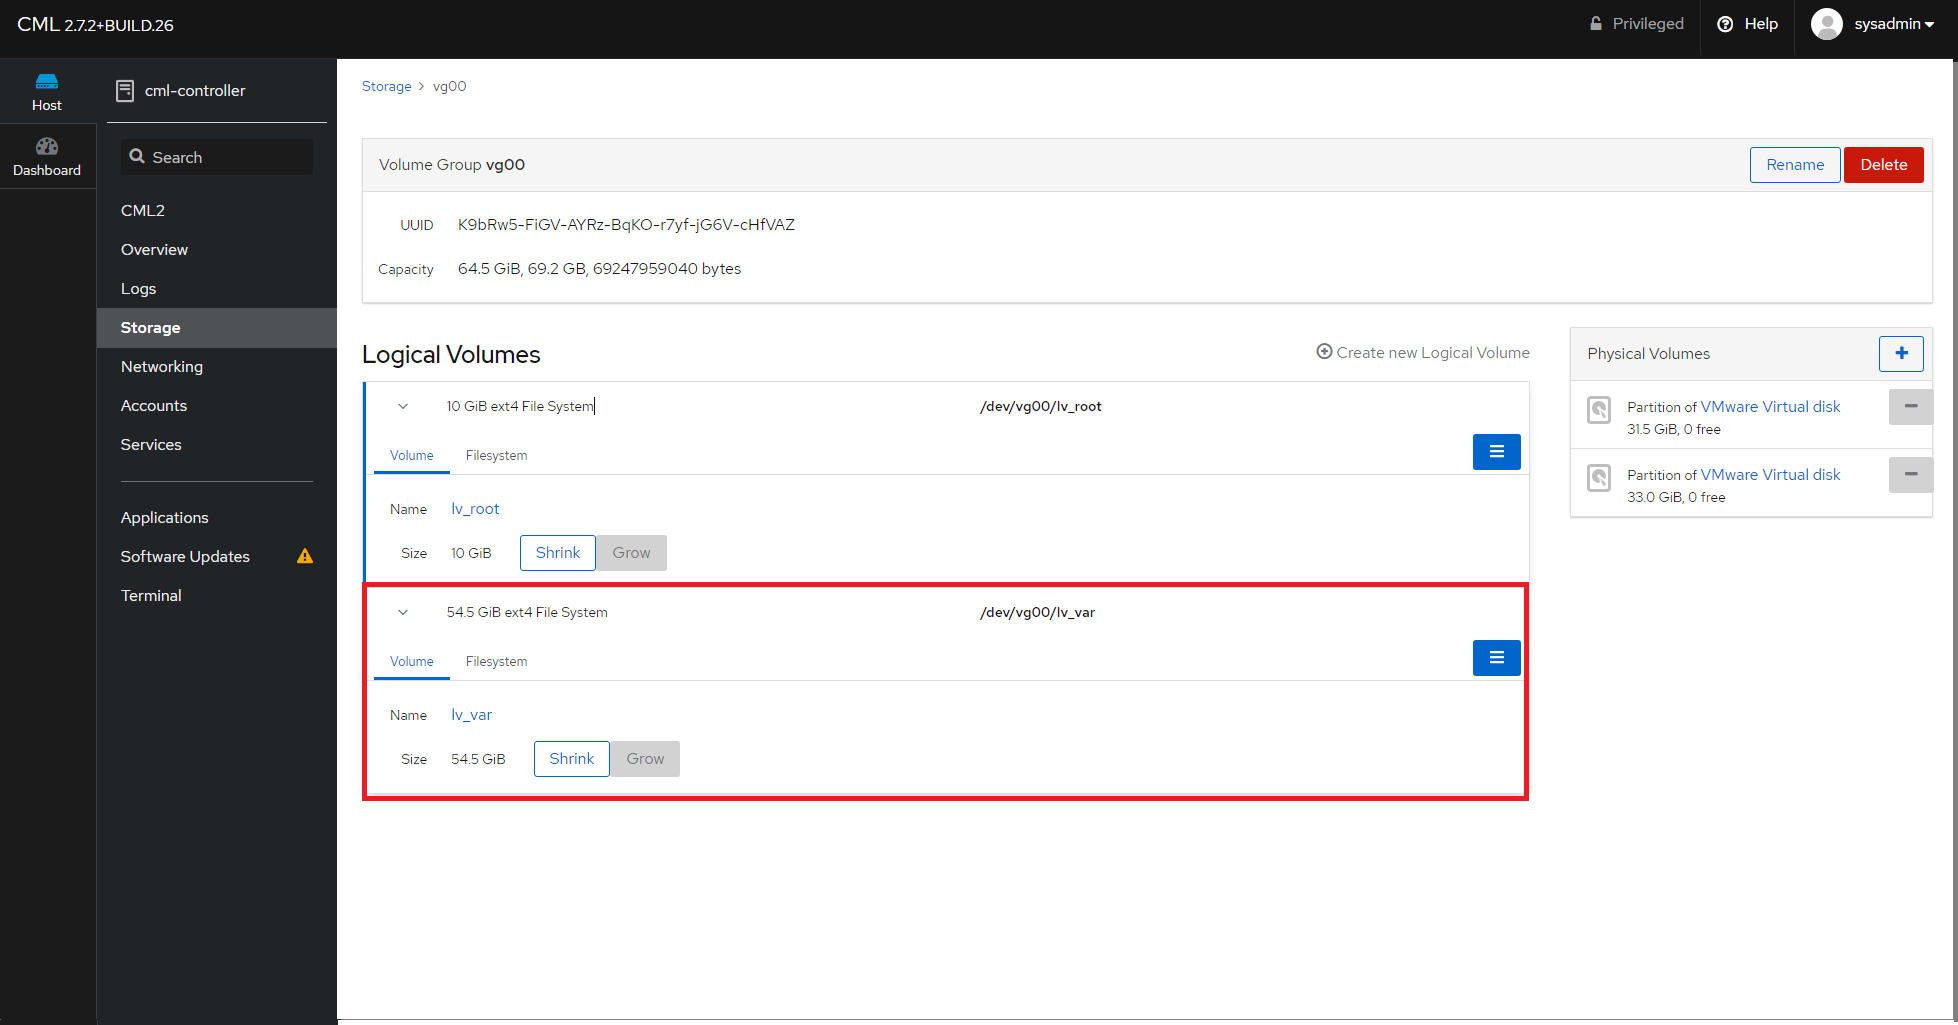
Access your lab’s nodes via Putty / SecureCRT
Once you are logged into your CML environment making a new lab and adding the nodes is pretty straightforward. Accessing your nodes can be done with the build-in console. However accessing your nodes via an external client like Putty or SecureCRT is a little less intuitive.
There are several ways to access your nodes;
-
- CML Breakout Tool
- The Breakout Tool gives you local access to consoles and graphical interfaces of VMs running in a remote lab. The telnet protocol is used for console access, and VNC protocol is used for graphics-capable VMs. The Breakout Tool is a single executable file that you run on the command line. It provides a kind of proxy connection from the local machine, where the tool has been configured and started, to the nodes in the lab simulation. Once you install it, you can configure the Breakout Tool using a web interface that is accessible via the localhost (i.e.,
127.0.0.1or[::1]) or loopback address on port8080by default. The port and listen address and the CML server’s URL can be configured via command line options or the tool’s configuration file (config.yaml). Using the Breakout Tool, you can use your favorite terminal emulator app to connect to your nodes’ consoles on configurable local ports.
https://developer.cisco.com/docs/modeling-labs/breakout-tool-overview/
- The Breakout Tool gives you local access to consoles and graphical interfaces of VMs running in a remote lab. The telnet protocol is used for console access, and VNC protocol is used for graphics-capable VMs. The Breakout Tool is a single executable file that you run on the command line. It provides a kind of proxy connection from the local machine, where the tool has been configured and started, to the nodes in the lab simulation. Once you install it, you can configure the Breakout Tool using a web interface that is accessible via the localhost (i.e.,
- Opening the console via an SSH session on the CML Server.
- CML Breakout Tool
I’ve used the second option and here are the steps to do it.
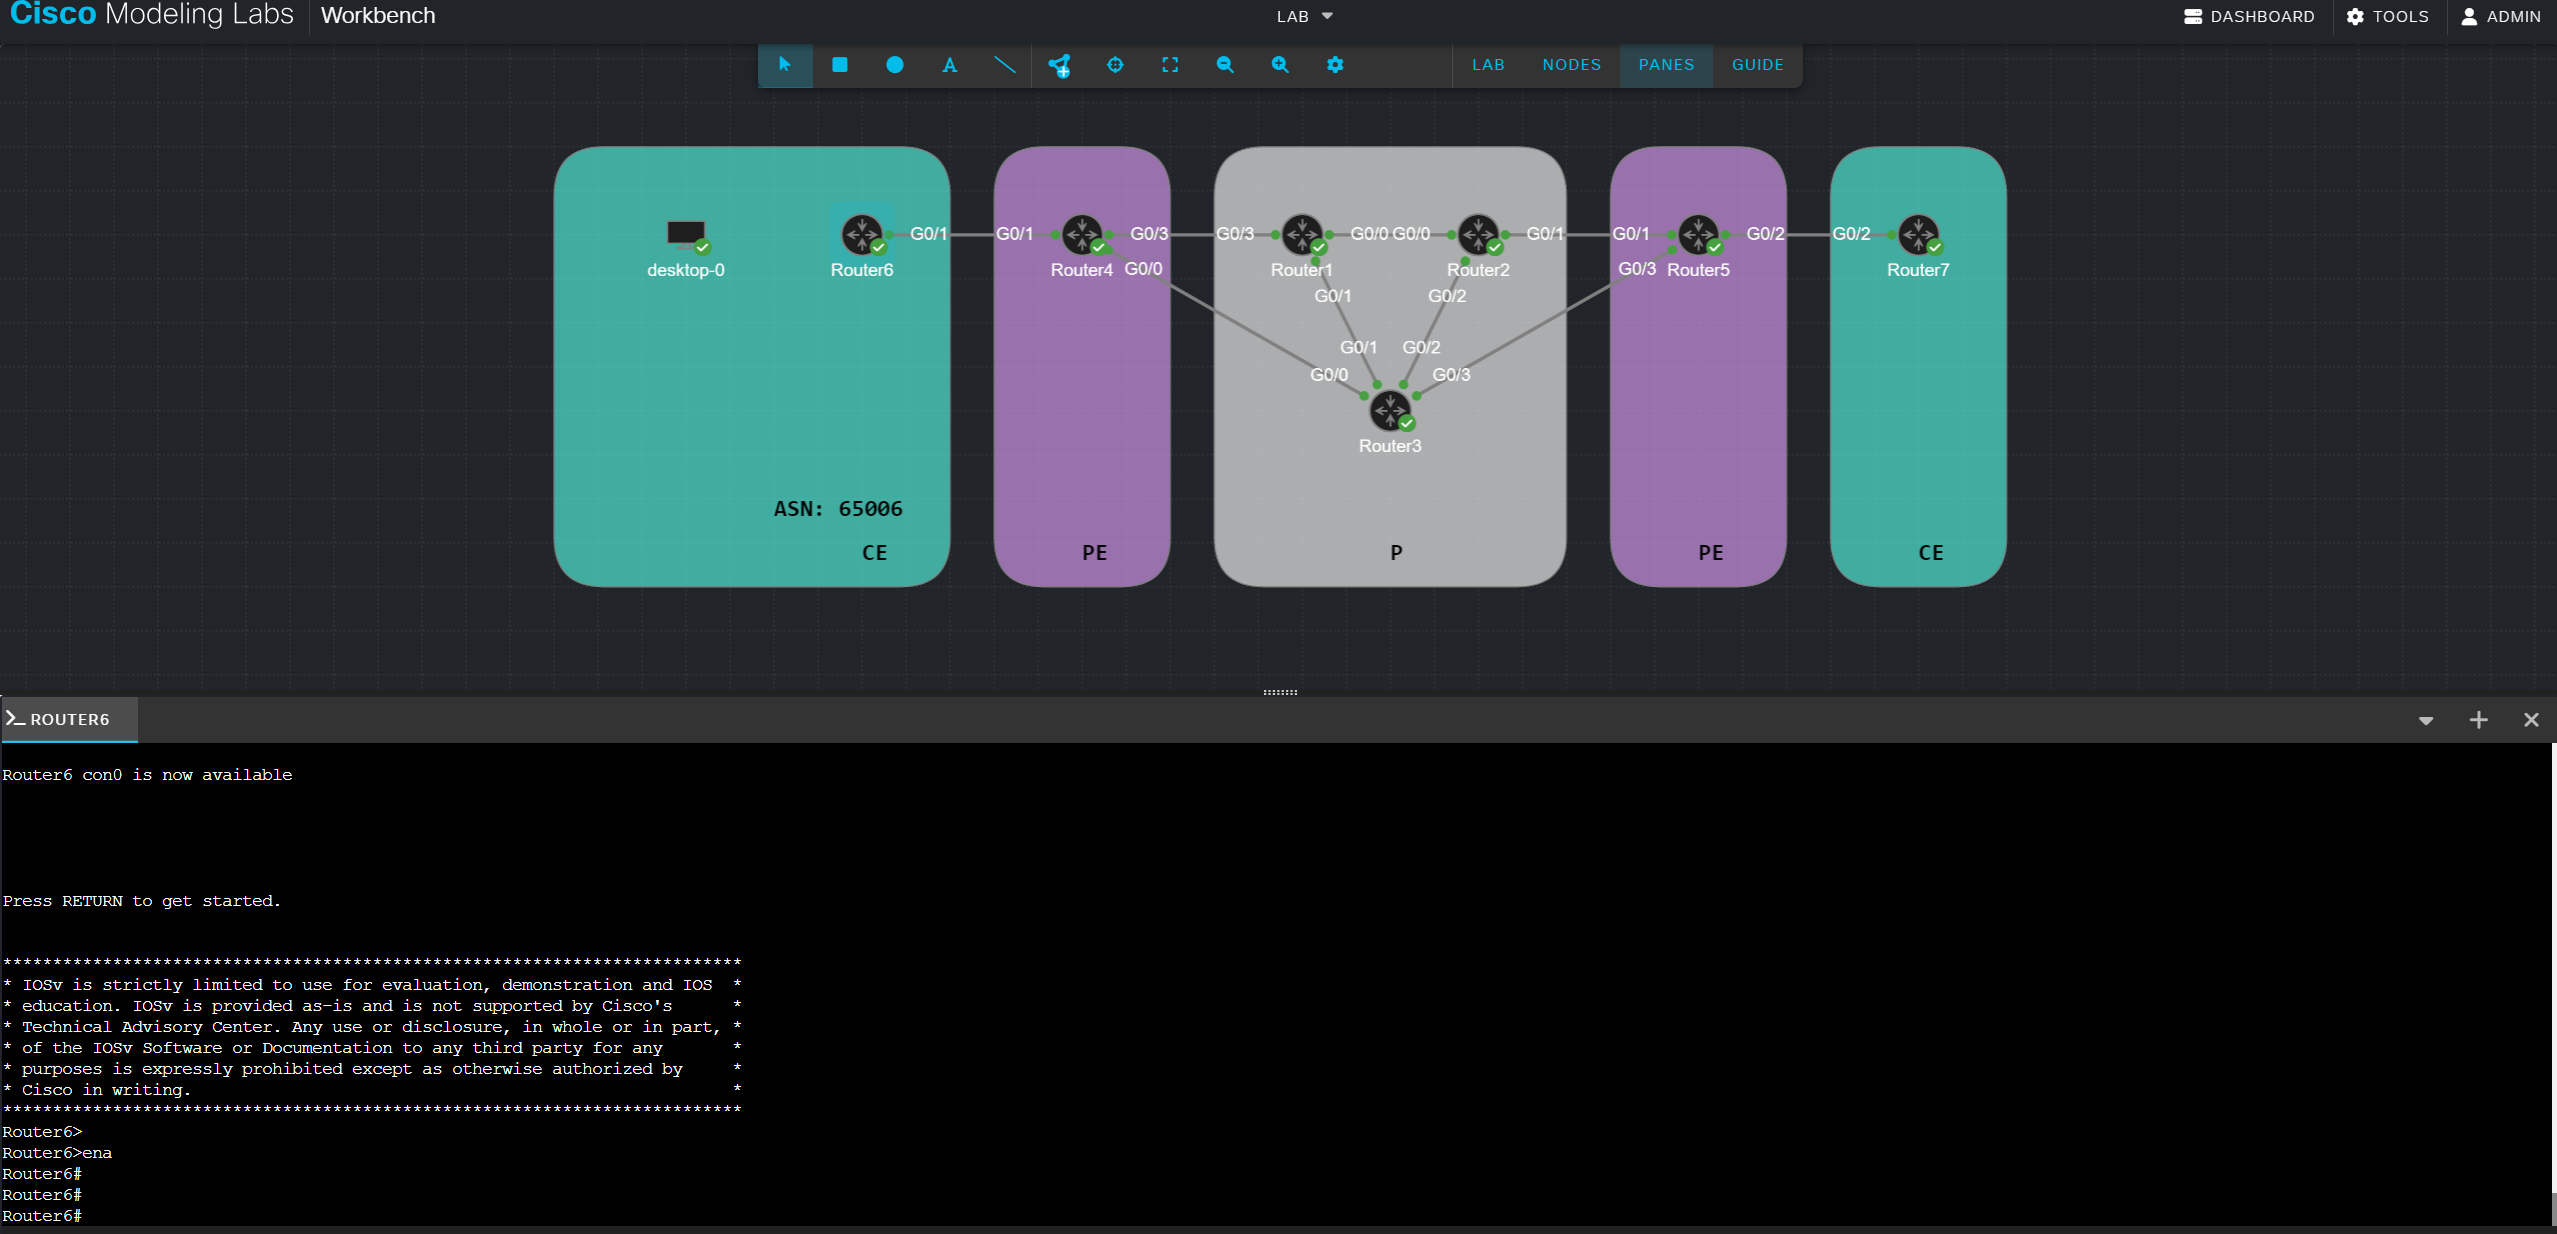
TestLab
I’ve created an MPLS test lab with the name “Lab” which contains 7 routers. The nodes are easily accessible via the build-in console but I want to connect using an external client without creating a proxy.
1: First we need to log into the CML server with SSH and find the console lines using the “list” command.
The output gives us the Lab name, the Node names, and the available lines. We need these in step 2.
2: Open the available consoles using the “open” command.
The format will be “open /LabName/NodeName/LineNumber” and it is case sensitive.
In my lab the command to open the console of Router1 is: open /Lab/Router1/0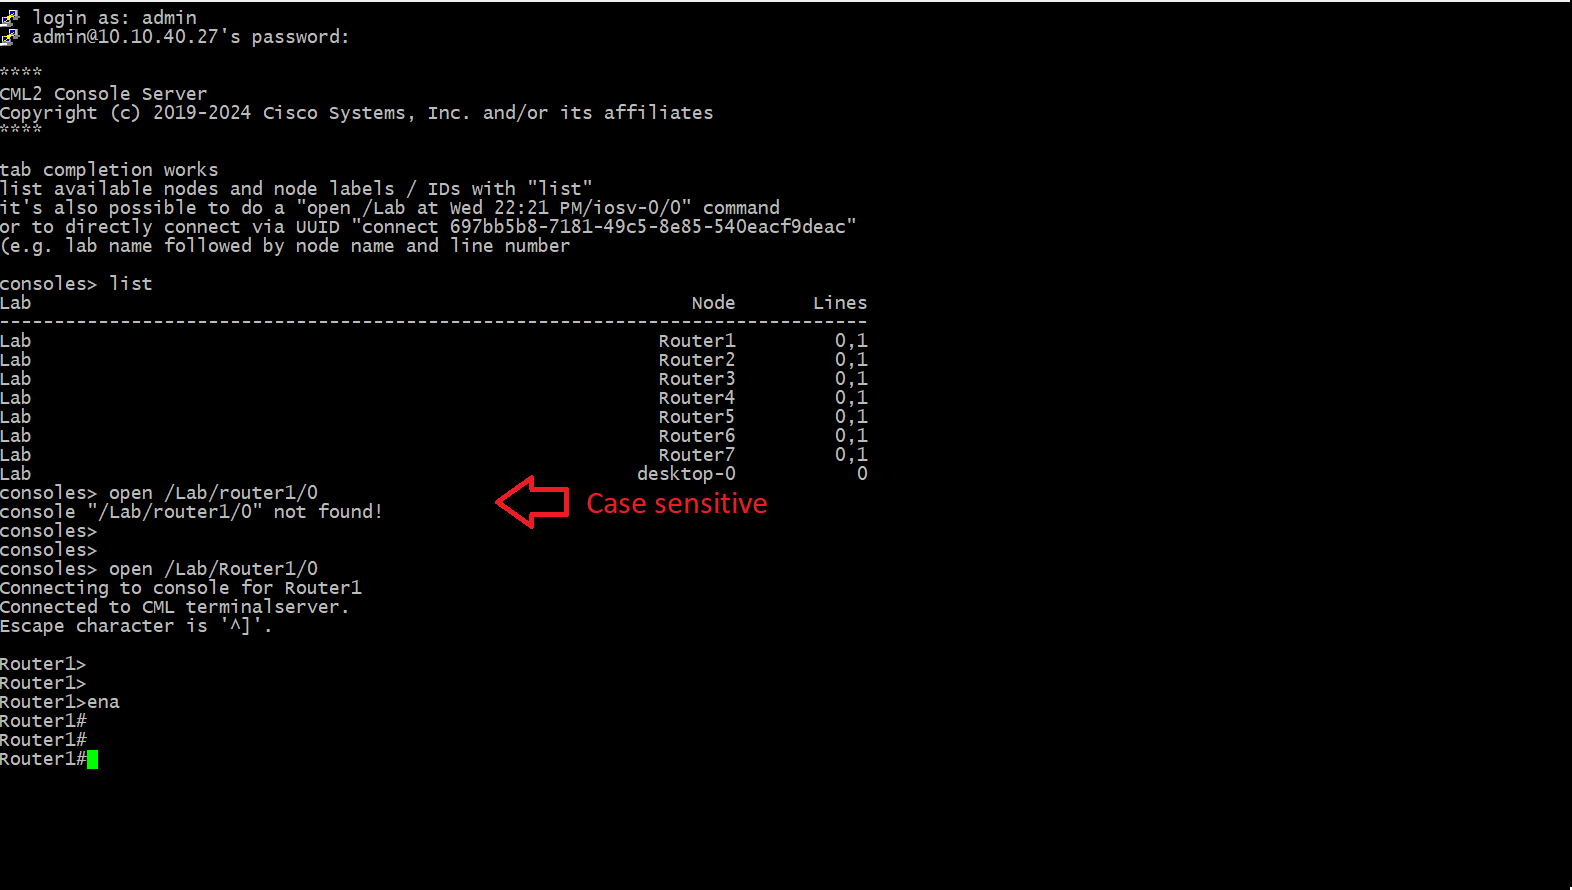
3: Add the syntax as a remote command to your Putty session configuration for quick access.
Once we know the names we can add commands for each console to our saved sessions.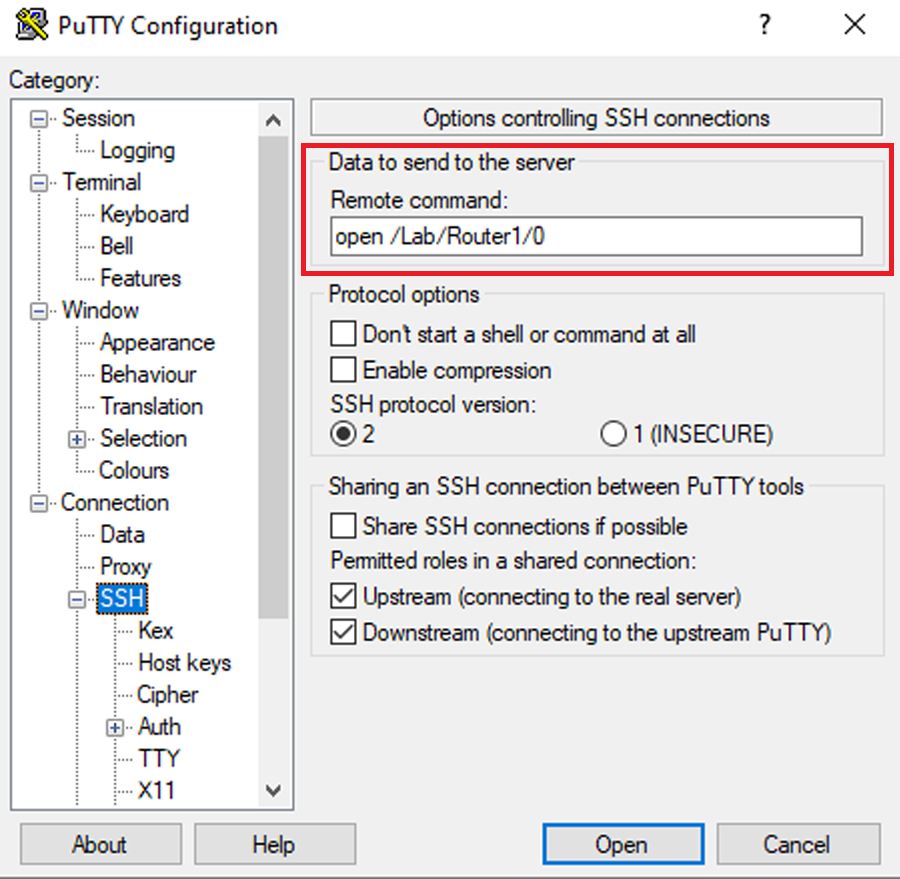
This will open an SSH session to your CML server and immediately open the console you configure.
I’ve created several saved sessions for each router’s console for quick access.
[QoL] Uploading files to Cisco TAC via CXD

CML 2.7 – Adding the IOS-XRv image