CML 2.7 – Getting started with APIs using Postman
Cisco Modeling Labs 2.7
Cisco Modeling Labs (CML) is a powerful, scalable network simulation platform that enables network engineers, IT administrators, and developers to design, build, and test networks in a controlled environment. The latest version, Cisco Modeling Labs 2.7, introduces new features and enhancements, including an improved REST API that enables seamless automation and integration. In this article, we’ll discuss how to get started with CML 2.7 and use Postman to interact with its API for network automation tasks.
CML API Documentation
Log in to Cisco Modeling Labs: Go to the CML web interface, typically accessed via your browser.
Find API Documentation: CML’s built-in documentation is available under Help > API Documentation. This provides detailed information on available API endpoints, request formats, and expected responses.

A new page will open with the documentation:
Here you can find all the information on the available CML API calls that you might need.
Setting up Postman
Create a CML Collection (Store your API calls)
In the section on the left click the + and create a new collection. In this collection you can save your API calls that you want to use again. Saved API calls are easily duplicated and edited.
Create a CML Environment (Store your variables)
In Postman you can create different Environments. In these environments it is possible to store variables that are used more than once in different API calls. The variables can be stored in different formats. It is also possible to use a response to set the value of a variable, which I will show later.
I made the following variables;
- url, the base url for the API calls. This is the CML IP address with https://<IP>/api/v0.
- username, username for authentication (one time to obtain the token)
- password, password for authentication (one time to obtain the token)
- token, which is used for authentication in the headers of other API calls.
Create CML API calls with Postman
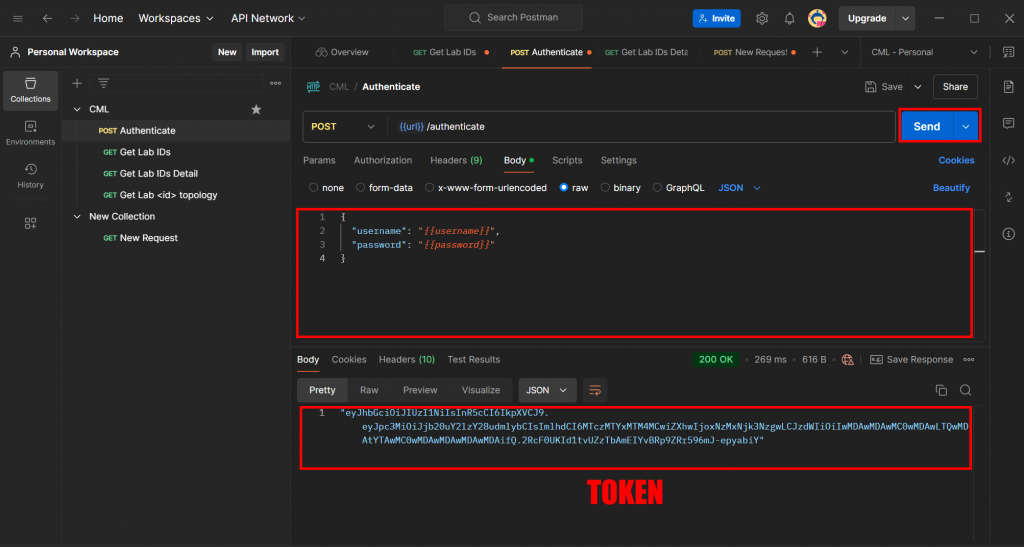
POST: Authenticate to get the token
The first step is to authenticate via an API call. The URL we need is;
- https://<CML IP>/api/v0/authenticate
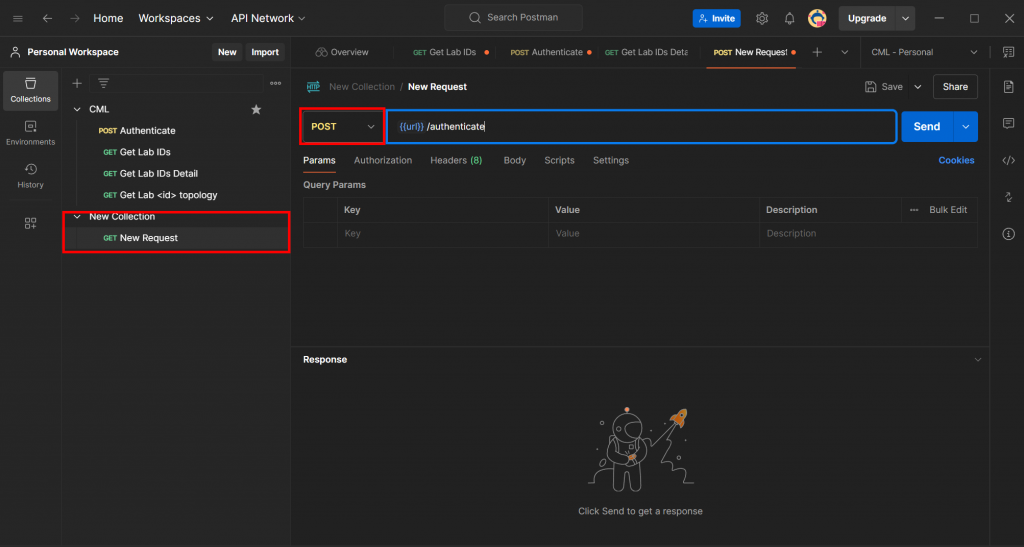
Click new request and set to POST.
Next is using the {{url}} variable we defined before and add /authenticate.

In the body we add the username and password combined with the {{variables}} we defined in our environment. When sending the API call we get a response (the token) that we can use for authentication.

GET: Get list of labs
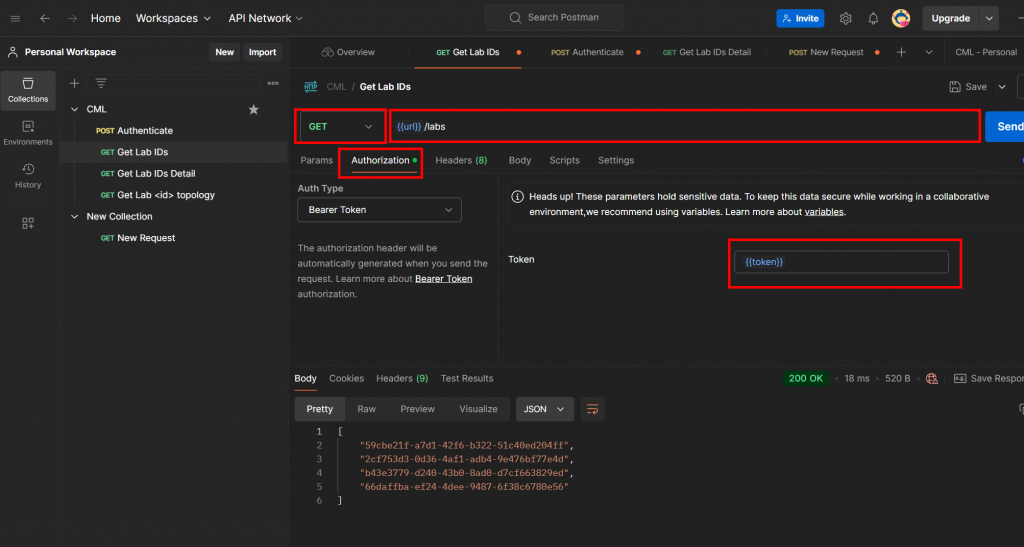
This API call is an example to get the IDs of the labs on the CML server. In Postman we can use a GET with the following url;
- https://<CML IP>/api/v0/labs
These API calls require the token from the previous step in the authorization tab. Set the Auth Type to “Bearer token” and paste the token hash, or the {{token}} variable once set.
After sending the API the call is successful and the response is the IDs of the four CML labs I have build.

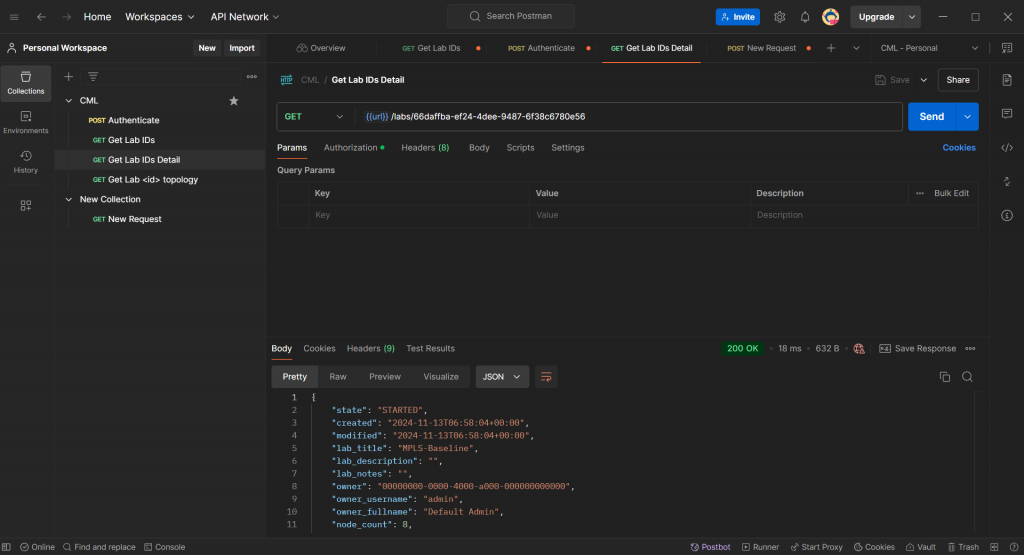
These IDs can in turn be used go get the details of the specific lab;

Using the CML API Documentation
The previous examples are well explained in the API documentation with many more to choose from.


